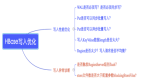
HTTP/HTTPS 請求還能這樣寫?SpringBoot + RestTemplate 最佳實踐!
在微服務架構盛行的今天,HTTP/HTTPS 已成為服務通信的基本手段。不論是前端對后端的數據請求,還是服務之間的內部調用,HTTP 請求無處不在。以往我們在傳統的 SSM 架構中,通常會選用 HttpURLConnection、Apache HttpClient 或者 OkHttp 來發起網絡請求,但這些方式配置繁瑣、使用復雜。
在 Spring Boot 中,RestTemplate 提供了極其簡潔高效的方式來發起 HTTP 請求。它封裝了常用請求邏輯,支持常見的 GET、POST、PUT、DELETE 方法,完美適配同步阻塞的場景,大大提升開發效率。
本文將從 HTTP 協議入門講起,逐步講解 RestTemplate 的多種用法,覆蓋從基礎請求到 HTTPS 忽略證書的處理技巧,助你全面掌握 Spring Boot 下的 HTTP 請求最佳實踐。
HTTP 協議簡要回顧
什么是 HTTP?
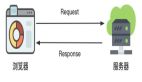
HTTP(HyperText Transfer Protocol)是 Web 上最常用的應用層協議,服務于客戶端(如瀏覽器)與服務器之間的數據交換。常見請求形式包括網頁、圖片、文件、JSON 數據等。
報文結構組成
- 起始行(Start Line)
請求行(Request Line):GET /index.html HTTP/1.1
狀態行(Status Line):HTTP/1.1 200 OK
- 頭部(Headers)
- 包含元數據:如 Content-Type: application/json,Authorization: Bearer ...
- 消息體(Body)
- 可選,用于攜帶實際傳輸的數據內容,POST/PUT 請求常見。
集成 RestTemplate 的準備工作
確保項目中包含 Spring Web 依賴(spring-boot-starter-web):
<!-- pom.xml -->
<dependency>
    <groupId>org.springframework.boot</groupId>
    <artifactId>spring-boot-starter-web</artifactId>
</dependency>
配置類中推薦通過 Bean 方式注入 RestTemplate:
// com/icoderoad/config/RestTemplateConfig.java
@Configuration
public class RestTemplateConfig {
    @Bean
    public RestTemplate restTemplate() {
        return new RestTemplate();
    }
}
GET 請求用法詳解
簡單 GET 請求
String url = "https://api.example.com/data";
String response = restTemplate.getForObject(url, String.class);
System.out.println("響應內容: " + response);
獲取響應狀態碼與頭部信息
ResponseEntity<String> response = restTemplate.getForEntity(url, String.class);
System.out.println("狀態碼: " + response.getStatusCode());
System.out.println("響應頭: " + response.getHeaders());
System.out.println("響應體: " + response.getBody());
URL 攜帶參數String url = "https://api.example.com/data?key1=abc&key2=123";
ResponseEntity<String> response = restTemplate.getForEntity(url, String.class);添加請求頭的 GET 請求
HttpHeaders headers = new HttpHeaders();
headers.set("Authorization", "Bearer token123");
HttpEntity<String> requestEntity = new HttpEntity<>(headers);
ResponseEntity<String> response = restTemplate.exchange(
    url, HttpMethod.GET, requestEntity, String.class
);
POST 請求完整示例
簡單 POST 請求
String url = "https://api.example.com/data";
String result = restTemplate.postForObject(url, null, String.class);
攜帶響應頭與狀態碼
ResponseEntity<String> response = restTemplate.postForEntity(url, null, String.class);提交表單數據(application/x-www-form-urlencoded)
MultiValueMap<String, String> params = new LinkedMultiValueMap<>();
params.add("username", "admin");
params.add("password", "123456");


HttpHeaders headers = new HttpHeaders();
headers.setContentType(MediaType.APPLICATION_FORM_URLENCODED);


HttpEntity<?> entity = new HttpEntity<>(params, headers);
ResponseEntity<String> response = restTemplate.postForEntity(url, entity, String.class);
提交 JSON 數據
Map<String, Object> jsonMap = new HashMap<>();
jsonMap.put("username", "admin");
jsonMap.put("password", "123456");


HttpHeaders headers = new HttpHeaders();
headers.setContentType(MediaType.APPLICATION_JSON);


HttpEntity<?> entity = new HttpEntity<>(jsonMap, headers);
ResponseEntity<String> response = restTemplate.postForEntity(url, entity, String.class);
上傳文件(multipart/form-data)
Resource file = new FileSystemResource("/path/to/file.txt");


MultiValueMap<String, Object> multipart = new LinkedMultiValueMap<>();
multipart.add("file", file);
multipart.add("comment", "上傳測試");


HttpHeaders headers = new HttpHeaders();
headers.setContentType(MediaType.MULTIPART_FORM_DATA);


HttpEntity<MultiValueMap<String, Object>> entity = new HttpEntity<>(multipart, headers);
ResponseEntity<String> response = restTemplate.postForEntity(url, entity, String.class);
所有請求類型都可通過 exchange() 方法實現:
String url = "https://api.example.com/data";


Map<String, Object> jsonMap = Map.of("key", "value");
HttpHeaders headers = new HttpHeaders();
headers.setContentType(MediaType.APPLICATION_JSON);
HttpEntity<?> entity = new HttpEntity<>(jsonMap, headers);


ResponseEntity<String> response = restTemplate.exchange(
    url, HttpMethod.PUT, entity, String.class
);
在 HttpMethod 中可選值包括:GET、POST、PUT、DELETE、OPTIONS、HEAD、PATCH。
如何發送 HTTPS 請求并忽略無效證書
有些服務使用了自簽名證書或失效證書,普通 RestTemplate 會驗證失敗。以下方式可以跳過證書校驗:
// com/icoderoad/config/SSLConfig.java
public class SSLConfig {
    public static RestTemplate getUnsafeRestTemplate() throws Exception {
        SSLContext sslContext = SSLContexts.custom()
            .loadTrustMaterial(null, (chain, authType) -> true).build();


        CloseableHttpClient httpClient = HttpClients.custom()
            .setSSLContext(sslContext)
            .setSSLHostnameVerifier(NoopHostnameVerifier.INSTANCE)
            .build();


        return new RestTemplate(new HttpComponentsClientHttpRequestFactory(httpClient));
    }
}
使用方式:
RestTemplate restTemplate = SSLConfig.getUnsafeRestTemplate();
String response = restTemplate.getForObject("https://self-signed.example.com", String.class);
System.out.println(response);
結語:RestTemplate 是老將,仍值得掌握
雖然在 Spring 5 之后官方推薦使用 WebClient 來替代 RestTemplate,但在很多老項目和同步請求場景下,RestTemplate 依舊是簡單高效的選擇。本文展示了 RestTemplate 在各種場景下的使用技巧,幫助你快速集成并靈活應對開發中常見的 HTTP 調用需求。
如果你對 Web 服務調用還停留在 HttpClient 層面,不妨嘗試用 RestTemplate 重構你的服務調用邏輯——它簡潔、易用、強大,值得每一位 Spring Boot 開發者掌握。