


Longhorn 企業(yè)級云原生容器存儲解決方案-部署篇
本文轉(zhuǎn)載自微信公眾號「黑客下午茶」,作者為少。轉(zhuǎn)載本文請聯(lián)系黑客下午茶公眾號。
系列
- Longhorn 是什么?
- Longhorn 云原生分布式塊存儲解決方案設(shè)計架構(gòu)和概念
安裝
Longhorn 可以通過多種方式安裝在 Kubernetes 集群上:
- Rancher catalog app
- kubectl
- Helm
安裝要求
安裝 Longhorn 的 Kubernetes 集群中的每個節(jié)點都必須滿足以下要求:
- 與 Kubernetes 兼容的容器運行時(Docker v1.13+、containerd v1.3.7+ 等)
- Kubernetes v1.16+.
- 推薦 Kubernetes v1.17+
- open-iscsi 已安裝,并且 iscsid 守護(hù)程序正在所有節(jié)點上運行。這是必要的,因為 Longhorn 依賴主機(jī)上的 iscsiadm 為 Kubernetes 提供持久卷。
- RWX support 要求每個節(jié)點都安裝 NFSv4 client。
- 主機(jī)文件系統(tǒng)支持 file extents 功能來存儲數(shù)據(jù)。目前我們支持:
- ext4
- XFS
- curl, findmnt, grep, awk, blkid, lsblk 必須安裝。
- Mount propagation 必須啟用。
Longhorn workloads 必須能夠以 root 身份運行才能正確部署和操作 Longhorn。
操作系統(tǒng)(OS)/發(fā)行版(Distro)特定配置
- Google Kubernetes Engine (GKE) Longhorn 需要一些額外的設(shè)置才能正常運行。
- K3s clusters 需要一些額外的設(shè)置。
- RKE clusters with CoreOS 需要 csi-on-rke-and-coreos
使用 Environment Check Script
我們編寫了一個腳本來幫助您收集有關(guān)這些因素的足夠信息。
注意在運行 env check 腳本之前,可能需要在本地安裝 jq。
運行腳本:
- curl -sSfL https://raw.githubusercontent.com/longhorn/longhorn/v{{< current-version >}}/scripts/environment_check.sh | bash
結(jié)果示例:
- daemonset.apps/longhorn-environment-check created
- waiting for pods to become ready (0/3)
- all pods ready (3/3)
- MountPropagation is enabled!
- cleaning up...
- daemonset.apps "longhorn-environment-check" deleted
- clean up complete
Pod 安全策略
從 v1.0.2 開始,Longhorn 附帶了默認(rèn)的 Pod 安全策略,該策略將為 Longhorn 提供必要的權(quán)限以使其能夠正常運行。
Longhorn 無需特殊配置即可在啟用了 Pod 安全策略的集群上正常工作。
注意 Mount Propagation
如果您的 Kubernetes 集群是由 Rancher v2.0.7+ 或更高版本提供的,則默認(rèn)啟用 MountPropagation 功能。
如果 MountPropagation 被禁用,Base Image 功能將被禁用。
安裝 open-iscsi
用于安裝 open-iscsi 的命令因 Linux 發(fā)行版而異。
對于 GKE,我們建議使用 Ubuntu 作為 guest OS image,因為它已經(jīng)包含 open-iscsi。
您可能需要編輯 cluster security group(集群安全組) 以允許 SSH 訪問。
對于 SUSE 和 openSUSE,請使用以下命令:
- zypper install open-iscsi
對于 Debian 和 Ubuntu,請使用以下命令:
- apt-get install open-iscsi
對于帶有 EKS Kubernetes Worker AMI with AmazonLinux2 image 的 RHEL、CentOS 和 EKS,請使用以下命令:
- yum install iscsi-initiator-utils
我們還提供了一個 iscsi 安裝程序,使用戶可以更輕松地自動安裝 open-iscsi:
- kubectl apply -f https://raw.githubusercontent.com/longhorn/longhorn/v{{< current-version >}}/deploy/prerequisite/longhorn-iscsi-installation.yaml
部署完成后,運行以下命令來檢查安裝程序的 pod 狀態(tài):
- kubectl get pod | grep longhorn-iscsi-installation
- longhorn-iscsi-installation-49hd7 1/1 Running 0 21m
- longhorn-iscsi-installation-pzb7r 1/1 Running 0 39m
也可以通過以下命令查看日志,查看安裝結(jié)果:
- kubectl logs longhorn-iscsi-installation-pzb7r -c iscsi-installation
- ...
- Installed:
- iscsi-initiator-utils.x86_64 0:6.2.0.874-7.amzn2
- Dependency Installed:
- iscsi-initiator-utils-iscsiuio.x86_64 0:6.2.0.874-7.amzn2
- Complete!
- Created symlink from /etc/systemd/system/multi-user.target.wants/iscsid.service to /usr/lib/systemd/system/iscsid.service.
- iscsi install successfully
安裝 NFSv4 client
用于安裝 NFSv4 client 的命令因 Linux 發(fā)行版而異。
對于 Debian 和 Ubuntu,請使用以下命令:
- apt-get install nfs-common
對于帶有 EKS Kubernetes Worker AMI with AmazonLinux2 image 的 RHEL、CentOS 和 EKS,請使用以下命令:
- yum install nfs-utils
我們還提供了一個 nfs 安裝程序,使用戶可以更輕松地自動安裝 nfs-client:
- kubectl apply -f https://raw.githubusercontent.com/longhorn/longhorn/v{{< current-version >}}/deploy/prerequisite/longhorn-nfs-installation.yaml
部署完成后,運行以下命令來檢查安裝程序的 pod 狀態(tài):
- kubectl get pod | grep longhorn-nfs-installation
- NAME READY STATUS RESTARTS AGE
- longhorn-nfs-installation-t2v9v 1/1 Running 0 143m
- longhorn-nfs-installation-7nphm 1/1 Running 0 143m
也可以通過以下命令查看日志,查看安裝結(jié)果:
- kubectl logs longhorn-nfs-installation-t2v9v -c nfs-installation
- ...
- nfs install successfully
檢查 Kubernetes 版本
使用以下命令檢查您的 Kubernetes 服務(wù)器版本
- kubectl version
結(jié)果:
- Client Version: version.Info{Major:"1", Minor:"19", GitVersion:"v1.19.3", GitCommit:"1e11e4a2108024935ecfcb2912226cedeafd99df", GitTreeState:"clean", BuildDate:"2020-10-14T12:50:19Z", GoVersion:"go1.15.2", Compiler:"gc", Platform:"linux/amd64"}
- Server Version: version.Info{Major:"1", Minor:"17", GitVersion:"v1.17.4", GitCommit:"8d8aa39598534325ad77120c120a22b3a990b5ea", GitTreeState:"clean", BuildDate:"2020-03-12T20:55:23Z", GoVersion:"go1.13.8", Compiler:"gc", Platform:"linux/amd64"}
Server Version 應(yīng)該是 v1.16 或更高版本。
作為 Rancher Catalog App 安裝
通過 Rancher catalog 安裝 Longhorn 的好處之一是 Rancher 為 Longhorn UI 提供身份驗證。
如果有新版本的 Longhorn 可用,您將在 Catalog Apps 屏幕上看到 Upgrade Available 標(biāo)志。您可以單擊 Upgrade 按鈕升級 Longhorn manager。
安裝
可選:我們建議為 Longhorn 創(chuàng)建一個新項目,例如 Storage。
導(dǎo)航到您將安裝 Longhorn 的 cluster 和 project。
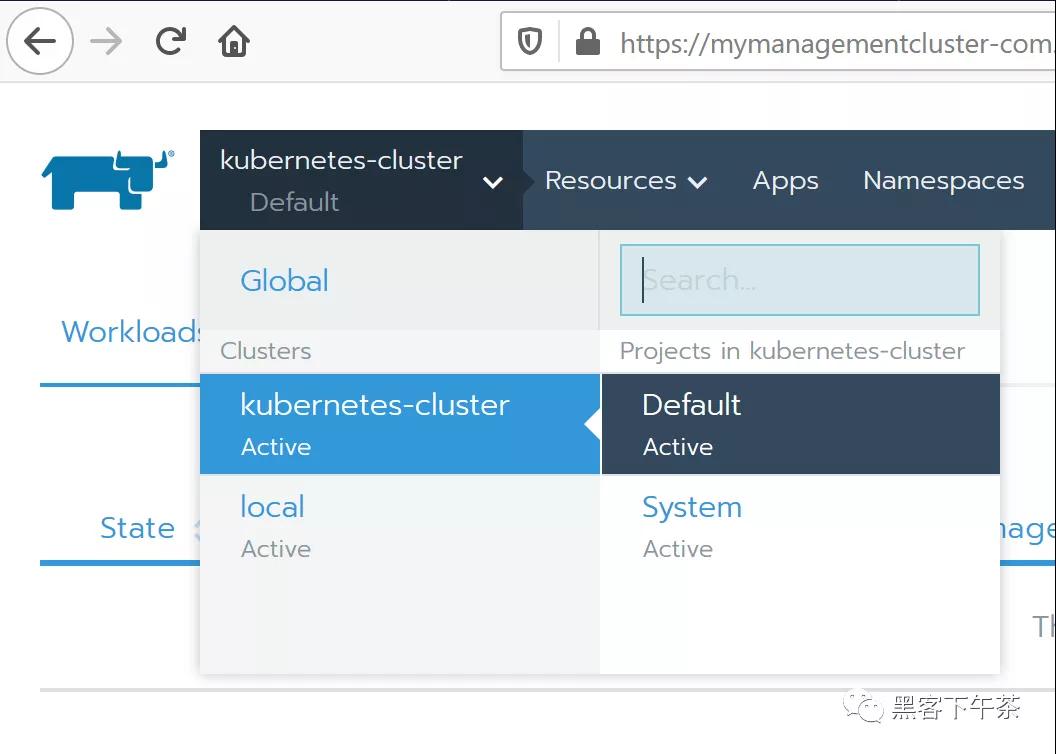
3. 導(dǎo)航到 Catalog Apps 屏幕。
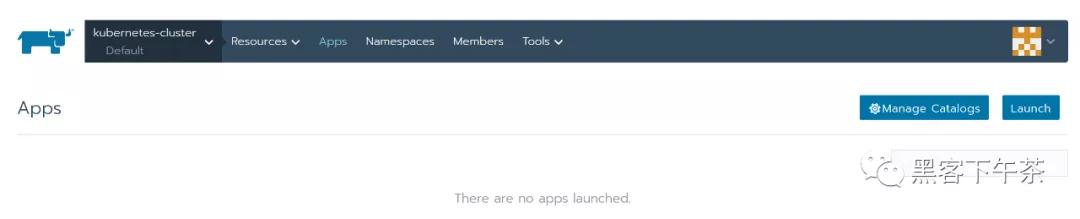
4. 在 catalog 中找到 Longhorn 項目并單擊它。
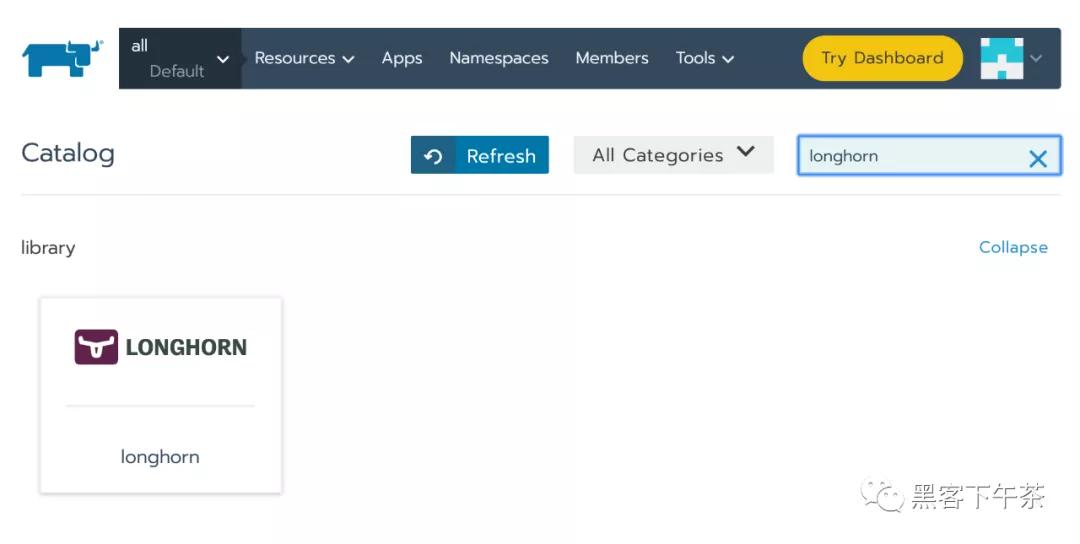
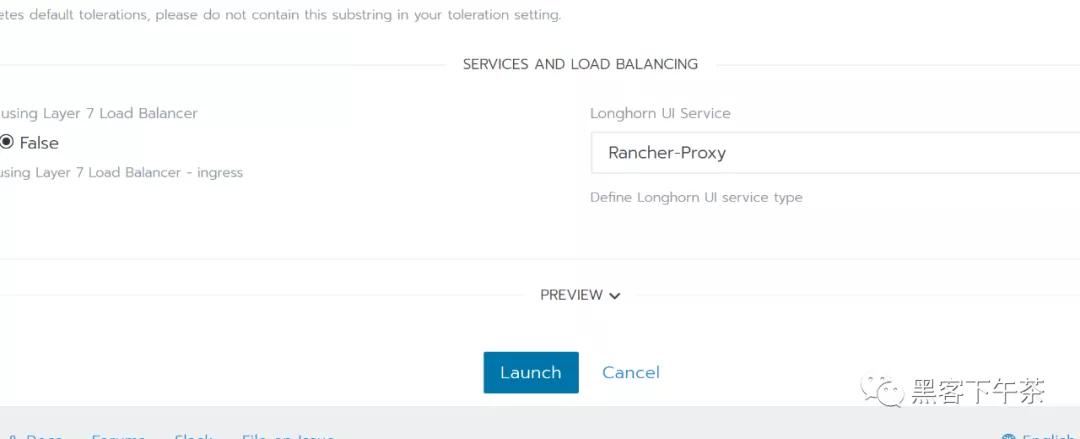
5. 可選:自定義默認(rèn)設(shè)置。6. 單擊 Launch。 Longhorn 將安裝在 longhorn-system 命名空間中。
現(xiàn)在 Longhorn 已經(jīng)安裝好了。
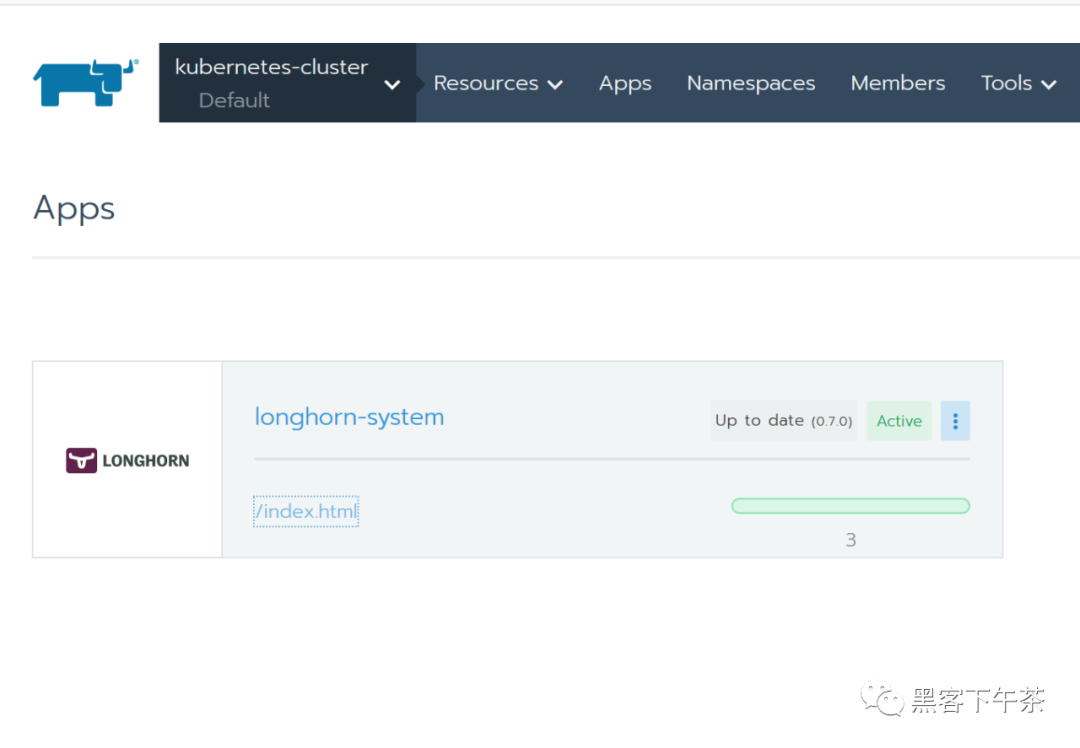
7. 單擊 index.html 鏈接導(dǎo)航到 Longhorn 儀表板。
成功安裝 Longhorn 后,您可以通過導(dǎo)航到 Catalog Apps 屏幕來訪問 Longhorn UI。
使用 Kubectl 安裝
安裝 Longhorn
使用以下命令在任何 Kubernetes 集群上安裝 Longhorn:
- kubectl apply -f https://raw.githubusercontent.com/longhorn/longhorn/v{{< current-version >}}/deploy/longhorn.yaml
監(jiān)視安裝進(jìn)度的一種方法是觀察在 longhorn-system 命名空間中創(chuàng)建的 pod:
- kubectl get pods \
- --namespace longhorn-system \
- --watch
檢查部署是否成功:
- $ kubectl -n longhorn-system get pod
- NAME READY STATUS RESTARTS AGE
- csi-attacher-6fdc77c485-8wlpg 1/1 Running 0 9d
- csi-attacher-6fdc77c485-psqlr 1/1 Running 0 9d
- csi-attacher-6fdc77c485-wkn69 1/1 Running 0 9d
- csi-provisioner-78f7db7d6d-rj9pr 1/1 Running 0 9d
- csi-provisioner-78f7db7d6d-sgm6w 1/1 Running 0 9d
- csi-provisioner-78f7db7d6d-vnjww 1/1 Running 0 9d
- engine-image-ei-6e2b0e32-2p9nk 1/1 Running 0 9d
- engine-image-ei-6e2b0e32-s8ggt 1/1 Running 0 9d
- engine-image-ei-6e2b0e32-wgkj5 1/1 Running 0 9d
- longhorn-csi-plugin-g8r4b 2/2 Running 0 9d
- longhorn-csi-plugin-kbxrl 2/2 Running 0 9d
- longhorn-csi-plugin-wv6sb 2/2 Running 0 9d
- longhorn-driver-deployer-788984b49c-zzk7b 1/1 Running 0 9d
- longhorn-manager-nr5rs 1/1 Running 0 9d
- longhorn-manager-rd4k5 1/1 Running 0 9d
- longhorn-manager-snb9t 1/1 Running 0 9d
- longhorn-ui-67b9b6887f-n7x9q 1/1 Running 0
要啟用對 Longhorn UI 的訪問,您需要設(shè)置一個 Ingress controller。默認(rèn)情況下不啟用對 Longhorn UI 的身份驗證。
已部署資源列表
以下項目將部署到 Kubernetes:
- Namespace: longhorn-system
所有 Longhorn bits 都將作用于這個命名空間。
- ServiceAccount: longhorn-service-account
Service account 是在 longhorn-system 命名空間中創(chuàng)建的。
- ClusterRole: longhorn-role
此角色將有權(quán)訪問:
- In apiextension.k8s.io (All verbs)
- customresourcedefinitions
- In core (All verbs)
- /status
- /logs
- pods
- events
- persistentVolumes
- persistentVolumeClaims
- nodes
- proxy/nodes
- secrets
- services
- endpoints
- configMaps
- In core
- namespaces (get, list)
- In apps (All Verbs)
- daemonsets
- statefulSets
- deployments
- In batch (All Verbs)
- jobs
- cronjobs
- In storage.k8s.io (All verbs)
- storageclasses
- volumeattachments
- csinodes
- csidrivers
- In coordination.k8s.io
- leases
ClusterRoleBinding: longhorn-bind
這將 longhorn-role 連接到 longhorn-system 命名空間中的 longhorn-service-account。
CustomResourceDefinitions
將安裝以下 CustomResourceDefinitions
- In longhorn.io
- engines
- replicas
- settings
- volumes
- engineimages
- nodes
- instancemanagers
Kubernetes API 對象
- 一個具有默認(rèn)設(shè)置 config map
- longhorn-manager DaemonSet
- longhorn-backend service 在內(nèi)部將 longhorn-manager DaemonSet 暴露給 Kubernetes
- longhorn-ui Deployment
- longhorn-frontend service 在內(nèi)部將 longhorn-ui 暴露給 Kubernetes
- longhorn-driver-deployer 部署 CSI driver
- longhorn StorageClass
使用 Helm 安裝
安裝 Helm 的注意事項
有關(guān)安裝 Helm 的幫助,請參閱官方文檔。
如果您使用的是 3.0 版之前的 Helm 版本,則需要使用基于角色的訪問控制 (RBAC) 在 Kubernetes 集群中安裝 Tiller。
安裝 Longhorn
添加 Longhorn Helm 存儲庫:
- helm repo add longhorn https://charts.longhorn.io
從存儲庫中獲取最新 charts:
- helm repo update
在 longhorn-system 命名空間中安裝 Longhorn。要使用 Helm 2 安裝 Longhorn,請使用以下命令:
- helm install longhorn/longhorn --name longhorn --namespace longhorn-system
要使用 Helm 3 安裝 Longhorn,請使用以下命令:
- kubectl create namespace longhorn-system
- helm install longhorn longhorn/longhorn --namespace longhorn-system
要確認(rèn)部署成功,請運行:
- kubectl -n longhorn-system get pod
結(jié)果應(yīng)如下所示:
- NAME READY STATUS RESTARTS AGE
- compatible-csi-attacher-d9fb48bcf-2rzmb 1/1 Running 0 8m58s
- csi-attacher-78bf9b9898-grn2c 1/1 Running 0 32s
- csi-attacher-78bf9b9898-lfzvq 1/1 Running 0 8m59s
- csi-attacher-78bf9b9898-r64sv 1/1 Running 0 33s
- csi-provisioner-8599d5bf97-c8r79 1/1 Running 0 33s
- csi-provisioner-8599d5bf97-fc5pz 1/1 Running 0 33s
- csi-provisioner-8599d5bf97-p9psl 1/1 Running 0 8m59s
- csi-resizer-586665f745-b7p6h 1/1 Running 0 8m59s
- csi-resizer-586665f745-kgdxs 1/1 Running 0 33s
- csi-resizer-586665f745-vsvvq 1/1 Running 0 33s
- engine-image-ei-e10d6bf5-pv2s6 1/1 Running 0 9m30s
- instance-manager-e-379373af 1/1 Running 0 8m41s
- instance-manager-r-101f13ba 1/1 Running 0 8m40s
- longhorn-csi-plugin-7v2dc 4/4 Running 0 8m59s
- longhorn-driver-deployer-775897bdf6-k4sfd 1/1 Running 0 10m
- longhorn-manager-79xgj 1/1 Running 0 9m50s
- longhorn-ui-9fbb5445-httqf 0/1 Running
要啟用對 Longhorn UI 的訪問,您需要設(shè)置一個 Ingress controller。默認(rèn)情況下不啟用對 Longhorn UI 的身份驗證。
訪問 UI
訪問和身份驗證的先決條件
這些說明假定已安裝 Longhorn。
如果您安裝了 Longhorn YAML 清單,則需要設(shè)置 Ingress controller 以允許外部流量進(jìn)入集群,并且默認(rèn)情況下不會啟用身份驗證。這適用于 Helm 和 kubectl 安裝。
如果 Longhorn 安裝為 Rancher catalog app,Rancher 會自動為您創(chuàng)建一個具有訪問控制(rancher-proxy)的 Ingress controller。
訪問 Longhorn UI
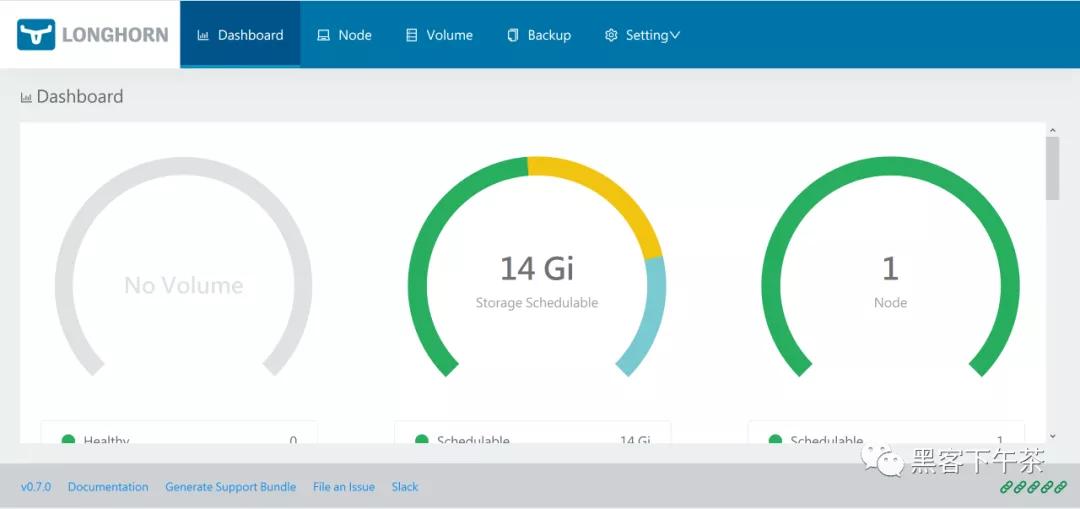
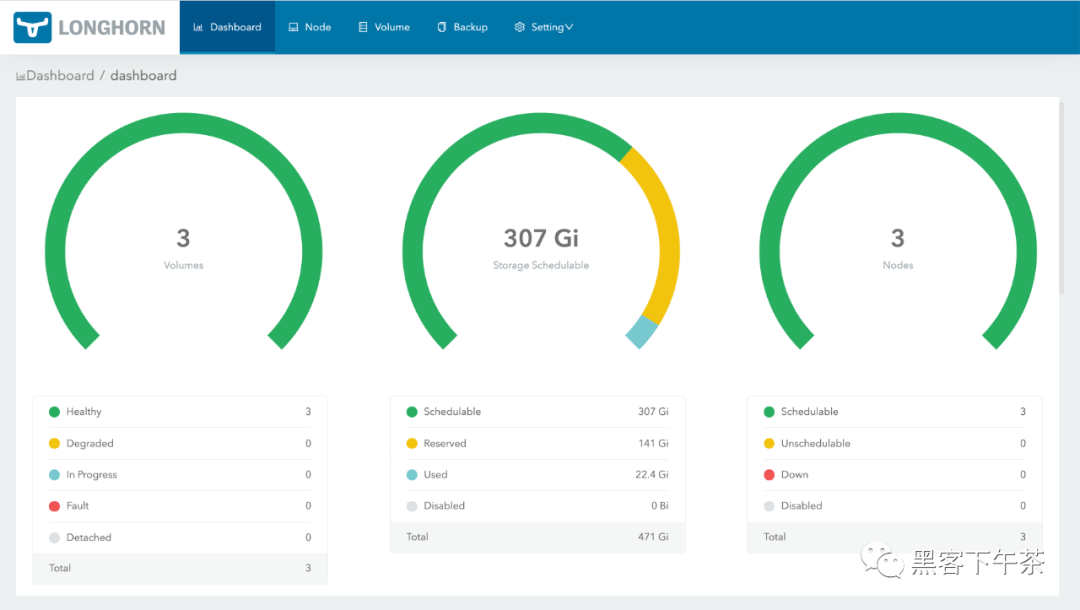
在您的 Kubernetes 集群中安裝 Longhorn 后,您可以訪問 UI dashboard。
1.獲取 Longhorn 的對外 service IP:
- kubectl -n longhorn-system get svc
對于 Longhorn v0.8.0,輸出應(yīng)如下所示,并且使用 longhorn-frontend 的 CLUSTER-IP 訪問 Longhorn UI:
- NAME TYPE CLUSTER-IP EXTERNAL-IP PORT(S) AGE
- longhorn-backend ClusterIP 10.20.248.250 <none> 9500/TCP 58m
- longhorn-frontend ClusterIP 10.20.245.110 <none> 80/TCP 58m
在上面的例子中,IP 是 10.20.245.110。
對于 Longhorn v0.8.0+,UI service 類型從 LoadBalancer 更改為 ClusterIP。
2.在瀏覽器中導(dǎo)航到 longhorn-frontend 的 IP。
Longhorn UI 如下所示:
使用基本身份驗證 (nginx) 創(chuàng)建 Ingress
如果您使用 kubectl 或 Helm 在 Kubernetes 集群上安裝 Longhorn,則需要創(chuàng)建一個 Ingress 以允許外部流量到達(dá) Longhorn UI。
默認(rèn)情況下,kubectl 和 Helm 安裝未啟用身份驗證。在這些步驟中,您將學(xué)習(xí)如何使用 nginx ingress controller 的 annotations 創(chuàng)建具有基本身份驗證的 Ingress。
創(chuàng)建一個基本的認(rèn)證文件 auth。生成的文件命名為 auth 很重要(實際上 - secret 有一個 key data.auth),否則 Ingress 返回 503。
- $ USER=; PASSWORD=; echo "${USER}:$(openssl passwd -stdin -apr1 <<< ${PASSWORD})" >> auth
創(chuàng)建一個 secret:
- $ kubectl -n longhorn-system create secret generic basic-auth --from-file=auth
創(chuàng)建一個 Ingress 清單 longhorn-ingress.yml :
- apiVersion: networking.k8s.io/v1
- kind: Ingress
- metadata:
- name: longhorn-ingress
- namespace: longhorn-system
- annotations:
- # type of authentication
- nginx.ingress.kubernetes.io/auth-type: basic
- # prevent the controller from redirecting (308) to HTTPS
- nginx.ingress.kubernetes.io/ssl-redirect: 'false'
- # name of the secret that contains the user/password definitions
- nginx.ingress.kubernetes.io/auth-secret: basic-auth
- # message to display with an appropriate context why the authentication is required
- nginx.ingress.kubernetes.io/auth-realm: 'Authentication Required '
- spec:
- rules:
- - http:
- paths:
- - pathType: Prefix
- path: "/"
- backend:
- service:
- name: longhorn-frontend
- port:
- number: 80
創(chuàng)建 Ingress:
- $ kubectl -n longhorn-system apply -f longhorn-ingress.yml
e.g.:
- $ USER=foo; PASSWORD=bar; echo "${USER}:$(openssl passwd -stdin -apr1 <<< ${PASSWORD})" >> auth
- $ cat auth
- foo:$apr1$FnyKCYKb$6IP2C45fZxMcoLwkOwf7k0
- $ kubectl -n longhorn-system create secret generic basic-auth --from-file=auth
- secret/basic-auth created
- $ kubectl -n longhorn-system get secret basic-auth -o yaml
- apiVersion: v1
- data:
- auth: Zm9vOiRhcHIxJEZueUtDWUtiJDZJUDJDNDVmWnhNY29Md2tPd2Y3azAK
- kind: Secret
- metadata:
- creationTimestamp: "2020-05-29T10:10:16Z"
- name: basic-auth
- namespace: longhorn-system
- resourceVersion: "2168509"
- selfLink: /api/v1/namespaces/longhorn-system/secrets/basic-auth
- uid: 9f66233f-b12f-4204-9c9d-5bcaca794bb7
- type: Opaque
- $ echo "
- apiVersion: networking.k8s.io/v1
- kind: Ingress
- metadata:
- name: longhorn-ingress
- namespace: longhorn-system
- annotations:
- # type of authentication
- nginx.ingress.kubernetes.io/auth-type: basic
- # prevent the controller from redirecting (308) to HTTPS
- nginx.ingress.kubernetes.io/ssl-redirect: 'false'
- # name of the secret that contains the user/password definitions
- nginx.ingress.kubernetes.io/auth-secret: basic-auth
- # message to display with an appropriate context why the authentication is required
- nginx.ingress.kubernetes.io/auth-realm: 'Authentication Required '
- spec:
- rules:
- - http:
- paths:
- - pathType: Prefix
- path: "/"
- backend:
- service:
- name: longhorn-frontend
- port:
- number: 80
- " | kubectl -n longhorn-system create -f -
- ingress.networking.k8s.io/longhorn-ingress created
- $ kubectl -n longhorn-system get ingress
- NAME HOSTS ADDRESS PORTS AGE
- longhorn-ingress * 45.79.165.114,66.228.45.37,97.107.142.125 80 2m7s
- $ curl -v http://97.107.142.125/
- * Trying 97.107.142.125...
- * TCP_NODELAY set
- * Connected to 97.107.142.125 (97.107.142.125) port 80 (#0)
- > GET / HTTP/1.1
- > Host: 97.107.142.125
- > User-Agent: curl/7.64.1
- > Accept: */*
- >
- < HTTP/1.1 401 Unauthorized
- < Server: openresty/1.15.8.1
- < Date: Fri, 29 May 2020 11:47:33 GMT
- < Content-Type: text/html
- < Content-Length: 185
- < Connection: keep-alive
- < WWW-Authenticate: Basic realm="Authentication Required"
- <
- <html>
- <head><title>401 Authorization Required</title></head>
- <body>
- <center><h1>401 Authorization Required</h1></center>
- <hr><center>openresty/1.15.8.1</center>
- </body>
- </html>
- * Connection #0 to host 97.107.142.125 left intact
- * Closing connection 0
- $ curl -v http://97.107.142.125/ -u foo:bar
- * Trying 97.107.142.125...
- * TCP_NODELAY set
- * Connected to 97.107.142.125 (97.107.142.125) port 80 (#0)
- * Server auth using Basic with user 'foo'
- > GET / HTTP/1.1
- > Host: 97.107.142.125
- > Authorization: Basic Zm9vOmJhcg==
- > User-Agent: curl/7.64.1
- > Accept: */*
- >
- < HTTP/1.1 200 OK
- < Date: Fri, 29 May 2020 11:51:27 GMT
- < Content-Type: text/html
- < Content-Length: 1118
- < Last-Modified: Thu, 28 May 2020 00:39:41 GMT
- < ETag: "5ecf084d-3fd"
- < Cache-Control: max-age=0
- <
- <!DOCTYPE html>
- <html lang="en">
- ......
AWS EKS Kubernetes 集群的附加步驟
您將需要創(chuàng)建一個 ELB(彈性負(fù)載均衡器)以將 nginx Ingress controller 公開到 Internet。可能需要支付額外費用。
根據(jù) nginx ingress controller documentation 創(chuàng)建必須的資源。
按照 ingress-nginx/deploy/#aws 步驟創(chuàng)建 ELB。
References
https://kubernetes.github.io/ingress-nginx/
升級
在這里,我們介紹了如何從所有以前的版本升級到最新的 Longhorn。
升級 Longhorn
升級過程通常有兩個步驟:首先將 Longhorn manager 升級到最新版本,然后使用最新的 Longhorn manager 手動將 Longhorn engine 升級到最新版本。
1. 升級 Longhorn manager
要從 v1.1.x 升級,請參閱 longhorn-manager。
2. 手動升級 Longhorn Engine
Longhorn Manager 升級后,Longhorn Engine 也需要使用 Longhorn UI 進(jìn)行升級。
3. 自動升級 Longhorn Engine
從 Longhorn v1.1.1 開始,我們提供了一個選項來幫助您自動升級引擎。
Note: Longhorn v1.1.0 和 v1.1.1 中提供的實例管理器鏡像 v1_20201216 中存在一個錯誤, 該錯誤可能導(dǎo)致具有數(shù)百個卷的大集群中的死鎖(deadlock)。在longhorn/issues/2697查看更多詳細(xì)信息。 Longhorn v1.1.2 附帶一個新的實例管理器鏡像 v1_20210621,它修復(fù)了死鎖, 但卷的引擎(engine)/副本(replica)進(jìn)程不會從舊的實例管理器遷移到新的實例管理器, 直到下一次分離(detached)/附加(attached)卷。Longhorn 這樣做是因為我們不想中斷卷的數(shù)據(jù)平面。
如果您在舊實例管理器中遇到死鎖,請按照issues/2697#issuecomment-879374809的恢復(fù)步驟操作
升級 Longhorn Manager
從 v1.1.x 升級
我們只支持從 v1.1.x 升級到 v1.1.2。其他版本請先升級到 v1.1.x。
支持從 v1.1.x 到 v1.1.2 的 Engine 實時升級。
對于 Longhorn 作為 Rancher app 安裝時的 airgap 升級,您需要修改鏡像名稱并刪除 registry URL 部分。
例如,Longhorn images 部分中的鏡像 registry.example.com/longhorn/longhorn-manager:v1.1.2 更改為 longhorn/longhorn-manager:v1.1.2。
準(zhǔn)備升級
如果 Longhorn 是使用 Helm Chart 安裝的,或者是作為 Rancher catalog app 安裝的, 請檢查以確保默認(rèn) StorageClass 中的參數(shù)未更改。更改默認(rèn) StorageClass 的參數(shù)可能會導(dǎo)致 chart 升級失敗。如果要重新配置 StorageClass 中的參數(shù),可以復(fù)制默認(rèn) StorageClass 的配置以創(chuàng)建另一個 StorageClass。
- The current default StorageClass has the following parameters:
- parameters:
- numberOfReplicas: <user specified replica count, 3 by default>
- staleReplicaTimeout: "30"
- fromBackup: ""
- baseImage: ""
升級
先決條件: 始終在升級前備份卷。如果出現(xiàn)任何問題,您可以使用備份恢復(fù)卷。
要使用 kubectl 升級,請運行以下命令:
- kubectl apply -f https://raw.githubusercontent.com/longhorn/longhorn/v1.1.2/deploy/longhorn.yaml
要使用 Helm 升級,請運行以下命令:
- helm upgrade longhorn ./longhorn/chart
在 Rancher 2.1 或更新版本管理的 Kubernetes 集群上,升級 catalog app longhorn-system 的步驟與安裝步驟類似。
然后等待所有 pod 開始運行并且 Longhorn UI 工作。例如:
- $ kubectl -n longhorn-system get pod
- NAME READY STATUS RESTARTS AGE
- csi-attacher-78bf9b9898-mb7jt 1/1 Running 1 3m11s
- csi-attacher-78bf9b9898-n2224 1/1 Running 1 3m11s
- csi-attacher-78bf9b9898-rhv6m 1/1 Running 1 3m11s
- csi-provisioner-8599d5bf97-dr5n4 1/1 Running 1 2m58s
- csi-provisioner-8599d5bf97-drzn9 1/1 Running 1 2m58s
- csi-provisioner-8599d5bf97-rz5fj 1/1 Running 1 2m58s
- csi-resizer-586665f745-5bkcm 1/1 Running 0 2m49s
- csi-resizer-586665f745-vgqx8 1/1 Running 0 2m49s
- csi-resizer-586665f745-wdvdg 1/1 Running 0 2m49s
- engine-image-ei-62c02f63-bjfkp 1/1 Running 0 14m
- engine-image-ei-62c02f63-nk2jr 1/1 Running 0 14m
- engine-image-ei-62c02f63-pjtgg 1/1 Running 0 14m
- engine-image-ei-ac045a0d-9bbb8 1/1 Running 0 3m46s
- engine-image-ei-ac045a0d-cqvv2 1/1 Running 0 3m46s
- engine-image-ei-ac045a0d-wzmhv 1/1 Running 0 3m46s
- instance-manager-e-4deb2a16 1/1 Running 0 3m23s
- instance-manager-e-5526b121 1/1 Running 0 3m28s
- instance-manager-e-eff765b6 1/1 Running 0 2m59s
- instance-manager-r-3b70b0db 1/1 Running 0 3m27s
- instance-manager-r-4f7d629a 1/1 Running 0 3m22s
- instance-manager-r-bbcf4f17 1/1 Running 0 2m58s
- longhorn-csi-plugin-bkgjj 2/2 Running 0 2m39s
- longhorn-csi-plugin-tjhhq 2/2 Running 0 2m39s
- longhorn-csi-plugin-zslp6 2/2 Running 0 2m39s
- longhorn-driver-deployer-75b6bf4d6d-d4hcv 1/1 Running 0 3m57s
- longhorn-manager-4j77v 1/1 Running 0 3m53s
- longhorn-manager-cwm5z 1/1 Running 0 3m50s
- longhorn-manager-w7scb 1/1 Running 0 3m50s
- longhorn-ui-8fcd9fdd-qpknp 1/1 Running 0 3
升級后
為避免現(xiàn)有卷崩潰,以及從已棄用的設(shè)置 Guaranteed Engine CPU 切換 到 the new instance manager CPU reservation mechanism(預(yù)留機(jī)制), Longhorn 將在升級期間根據(jù)已棄用的設(shè)置值從每個節(jié)點自動設(shè)置 Engine Manager CPU Request 和 Replica Manager CPU Request。然后,新的全局實例管理器 CPU 設(shè)置 Guaranteed Engine Manager CPU 和 Guaranteed Replica Manager CPU 將不會生效。您可能需要檢查新機(jī)制和設(shè)置說明,以查看是否需要進(jìn)行任何調(diào)整。
故障排除
Error: "longhorn" is invalid: provisioner: Forbidden: updates to provisioner are forbidden.
這意味著對默認(rèn) storageClass 進(jìn)行了一些修改,您需要在升級前清理舊的。
要清理已棄用的 StorageClass,請運行以下命令:
- kubectl delete -f https://raw.githubusercontent.com/longhorn/longhorn/v1.1.2/examples/storageclass.yaml
手動升級 Longhorn Engine
在本節(jié)中,您將學(xué)習(xí)如何從 Longhorn UI 手動升級 Longhorn Engine。
先決條件
在升級 Longhorn engine 鏡像之前,請務(wù)必進(jìn)行備份。
在升級 Longhorn engine 之前升級 Longhorn manager。
Note: Longhorn v1.1.0 和 v1.1.1 中提供的實例管理器鏡像 v1_20201216 中存在一個錯誤, 該錯誤可能導(dǎo)致具有數(shù)百個卷的大集群中的死鎖(deadlock)。在longhorn/issues/2697查看更多詳細(xì)信息。 Longhorn v1.1.2 附帶一個新的實例管理器鏡像 v1_20210621,它修復(fù)了死鎖, 但卷的引擎/副本(engine/replica)進(jìn)程不會從舊的實例管理器遷移到新的實例管理器, 直到下一次分離/附加(detached/attached)卷。Longhorn 這樣做是因為我們不想中斷卷的數(shù)據(jù)平面。
為了減少引擎/副本(engine/replica)進(jìn)程仍在舊實例管理器中時發(fā)生死鎖的機(jī)會,您應(yīng)該小批量升級卷的引擎,例如,一次升級 2 或 3 個卷。
離線升級
如果無法進(jìn)行實時升級,或者卷處于降級狀態(tài),請執(zhí)行以下步驟:
- 按照 相關(guān) workloads 的 detach procedure 進(jìn)行。
- 使用批量選擇選擇所有卷。單擊批量操作按鈕 Upgrade Engine,在列表中選擇可用的 engine 鏡像。這是此版本管理器附帶的默認(rèn)引擎。
- 恢復(fù)所有 workloads。任何不屬于 Kubernetes workload 的卷都必須從 Longhorn UI 附加。
實時升級
從 v1.1.x 升級到 v1.1.2 支持實時升級。
iSCSI 前端不支持實時升級。
實時升級應(yīng)該只對健康的卷進(jìn)行。
- 選擇要升級的卷。
- 單擊下拉菜單中的 Upgrade Engine。
- 選擇要升級到的 engine 鏡像。
- 通常它是列表中唯一的 engine 鏡像,因為 UI 從列表中排除當(dāng)前鏡像。
單擊 OK。
在實時升級期間,用戶會暫時看到雙倍數(shù)量的副本(replicas)。升級完成后,用戶應(yīng)該看到與之前相同數(shù)量的副本(replicas),并且應(yīng)該更新卷的 Engine Image 字段。
請注意,實時升級后,Rancher 或 Kubernetes 仍會顯示 engine 的舊版本鏡像和副本(replicas)的新版本。這是預(yù)期的。如果您在 Volume Detail 頁面中看到新版本的鏡像列為卷鏡像,則升級成功。
清理舊鏡像
完成所有鏡像的升級后,從 Longhorn UI 中選擇 Settings/Engine Image。現(xiàn)在您應(yīng)該能夠刪除非默認(rèn)鏡像。
自動升級 Longhorn Engine
從 Longhorn v1.1.1 開始,我們提供了一個選項,可以幫助您在升級 Longhorn manager 后自動將 Longhorn 卷升級到新的默認(rèn)引擎版本。此功能減少了升級 Longhorn 時必須做的手動工作量。有一些相關(guān)的概念 此功能如下所示:
1. 每個節(jié)點限制設(shè)置的并發(fā)自動引擎升級
這是一個設(shè)置,用于控制在升級 Longhorn manager 后,Longhorn 如何自動將卷的引擎升級到新的默認(rèn)引擎鏡像。此設(shè)置的值指定允許每個節(jié)點同時升級到默認(rèn)引擎鏡像的最大引擎數(shù)量。如果該值為 0,則 Longhorn 不會自動將卷的引擎升級到默認(rèn)版本。該值越大,引擎升級過程完成得越快。
但是,為該設(shè)置提供更大的值會在引擎升級過程中消耗更多節(jié)點的 CPU 和內(nèi)存。我們建議將該值設(shè)置為 3,以便為錯誤留出一些空間,但不要因升級失敗過多而使系統(tǒng)不堪重負(fù)。
2. Longhorn 在不同體積條件下的行為。
在以下情況下,假設(shè) concurrent automatic engine upgrade per node limit(并發(fā)自動引擎升級每節(jié)點限制)設(shè)置大于 0。
- 附加卷
如果卷處于附加狀態(tài)并且健康,Longhorn 會自動將卷的引擎實時升級到新的默認(rèn)引擎鏡像。
- 分離卷
Longhorn 自動對分離的卷進(jìn)行離線升級。
- 容災(zāi)卷
Longhorn 不會自動將 disaster recovery volumes 升級到新的默認(rèn)引擎鏡像,因為它會觸發(fā)災(zāi)難恢復(fù)卷的完全恢復(fù)。完全恢復(fù)可能會影響系統(tǒng)中其他正在運行的 Longhorn 卷的性能。因此,Longhorn 由您決定何時是手動升級災(zāi)難恢復(fù)卷引擎的好時機(jī)(例如,當(dāng)系統(tǒng)空閑時或在維護(hù)期間)。
但是,當(dāng)您激活容災(zāi)卷時,它會被激活然后分離。此時,Longhorn 會自動對卷進(jìn)行脫機(jī)升級,類似于分離卷的情況。
3. 如果升級失敗會怎樣?
如果卷升級引擎失敗,卷 spec 中的引擎鏡像將保持與卷狀態(tài)中的引擎鏡像不同。Longhorn 將不斷重試升級,直到成功。
如果每個節(jié)點無法升級的卷太多(即超過 concurrent automatic engine upgrade per node limit(每個節(jié)點的并發(fā)自動引擎升級限制)設(shè)置),Longhorn 將停止升級該節(jié)點上的卷。
卸載 Longhorn
在本節(jié)中,您將學(xué)習(xí)如何卸載 Longhorn。
- 先決條件
- 從 Rancher UI 卸載 Longhorn
- 使用 Helm 卸載 Longhorn
- 使用 kubectl 卸載 Longhorn
- 故障排除
先決條件
為了防止對 Kubernetes 集群造成損壞, 我們建議刪除所有使用 Longhorn 卷(PersistentVolume、PersistentVolumeClaim、StorageClass、Deployment、StatefulSet、DaemonSet 等)的 Kubernetes 工作負(fù)載。
從 Rancher UI 卸載 Longhorn
從 Rancher UI,導(dǎo)航到 Catalog Apps 選項卡并刪除 Longhorn app。
使用 Helm 卸載 Longhorn
運行此命令:
- helm uninstall longhorn -n longhorn-system
使用 kubectl 卸載 Longhorn
創(chuàng)建卸載 job 以從系統(tǒng)中清除 CRDs 并等待成功:
- kubectl create -f https://raw.githubusercontent.com/longhorn/longhorn/v1.1.2/uninstall/uninstall.yaml
- kubectl get job/longhorn-uninstall -n default -w
示例輸出:
- $ kubectl create -f https://raw.githubusercontent.com/longhorn/longhorn/v1.1.2/uninstall/uninstall.yaml
- serviceaccount/longhorn-uninstall-service-account created
- clusterrole.rbac.authorization.k8s.io/longhorn-uninstall-role created
- clusterrolebinding.rbac.authorization.k8s.io/longhorn-uninstall-bind created
- job.batch/longhorn-uninstall created
- $ kubectl get job/longhorn-uninstall -n default -w
- NAME COMPLETIONS DURATION AGE
- longhorn-uninstall 0/1 3s 3s
- longhorn-uninstall 1/1 20s 20s
- ^C
刪除剩余的組件:
- kubectl delete -f https://raw.githubusercontent.com/longhorn/longhorn/v1.1.2/deploy/longhorn.yaml
- kubectl delete -f https://raw.githubusercontent.com/longhorn/longhorn/v1.1.2/uninstall/uninstall.yaml
Tip: 如果您先嘗試 kubectl delete -f https://raw.githubusercontent.com/longhorn/longhorn/v{{< current-version >}}/deploy/longhorn.yaml 并卡在那里,請按 Ctrl C 然后運行 kubectl create -f https://raw.githubusercontent.com/longhorn/longhorn/v{{< current-version >}}/uninstall/uninstall.yaml 也可以幫你移除 Longhorn。最后,不要忘記清理剩余的組件。
故障排除
我從 Rancher UI 中刪除了 Longhorn 應(yīng)用程序,而不是按照卸載程序進(jìn)行操作
重新部署(相同版本)Longhorn App。按照上面的卸載程序進(jìn)行操作。
CRDs 的問題
如果您的 CRD 實例或 CRD 本身由于某種原因無法刪除,請運行以下命令進(jìn)行清理。注意:這將清除所有 Longhorn 狀態(tài)!
- # Delete CRD finalizers, instances and definitions
- for crd in $(kubectl get crd -o jsonpath={.items[*].metadata.name} | tr ' ' '\n' | grep longhorn.rancher.io); do
- kubectl -n ${NAMESPACE} get $crd -o yaml | sed "s/\- longhorn.rancher.io//g" | kubectl apply -f -
- kubectl -n ${NAMESPACE} delete $crd --all
- kubectl delete crd/$crd
- done
卷可以從 UI 附加/分離,但 Kubernetes Pod/StatefulSet 等不能使用它
檢查卷插件目錄是否設(shè)置正確。除非用戶明確設(shè)置,否則會自動檢測到它。注意:FlexVolume 插件自 Longhorn v0.8.0 起已棄用,不應(yīng)再使用。
默認(rèn)情況下,Kubernetes 使用 /usr/libexec/kubernetes/kubelet-plugins/volume/exec/,如官方文檔所述。
一些供應(yīng)商出于各種原因選擇更改目錄。例如,GKE 使用 /home/kubernetes/flexvolume 代替。
用戶可以通過在主機(jī)上運行 ps aux|grep kubelet 并檢查 --volume-plugin-dir 參數(shù)來找到正確的目錄。如果沒有,將使用默認(rèn)的 /usr/libexec/kubernetes/kubelet-plugins/volume/exec/。


