JDK1.8也可以對接DeepSeek-R1,你知道嗎?
什么是ai4j
首先,我們先了解一下什么是ai4j。
AI4J 是一款 Java SDK,用于快速接入 AI 大模型應用。它能整合多平臺大模型,如 OpenAI、Ollama、智譜 Zhipu(ChatGLM)、深度求索 DeepSeek、月之暗面 Moonshot(Kimi)、騰訊混元 Hunyuan、零一萬物(01)等,為用戶提供快速整合 AI 的能力。
其特點包括提供統一的輸入輸出(對齊 OpenAI)以消除差異化,優化函數調用(Tool Call)和 RAG 調用,支持向量數據庫(如 Pinecone),并且支持 JDK1.8,能滿足很多仍在使用 JDK8 版本的應用需求。
敲重點:JDK1.8
看過上一篇使用SpringAI的都知道,SpringAI對JDK的要求非常高,那次了不起使用了JDK 17,但是Java發展了這么多年,很多項目都是基于JDK1.8來構建的,你讓他們現在去升級JDK,可能AI還沒接入,項目就先起不來了。
也因此誕生了ai4j,他支持 JDK1.8,能滿足很多仍在使用 JDK8 版本的應用需求,并且向量數據庫還能幫助很多項目做知識庫搜索。
進入正題
我們使用目前最新版本的ai4j。
<dependency>
      <groupId>io.github.lnyo-cly</groupId>
      <artifactId>ai4j</artifactId>
      <version>0.8.1</version>
  </dependency>
現在網上很多版本的ai4j都不支持ollama調用,所以直接使用最新版本的話,就沒有問題了。
我們依舊是寫兩個接口,一個直接返回,一個流式返回。
IChatService chatService = aiService.getChatService(PlatformType.OLLAMA);通過getChatService的方式,選擇是用本地ollama還是其他平臺。
它一共支持以下平臺。
@AllArgsConstructor
@Getter
public enum PlatformType {
    OPENAI("openai"),
    ZHIPU("zhipu"),
    DEEPSEEK("deepseek"),
    MOONSHOT("moonshot"),
    HUNYUAN("hunyuan"),
    LINGYI("lingyi"),
    OLLAMA("ollama"),
    MINIMAX("minimax"),
    BAICHUAN("baichuan"),
    ;
   ....
}
由于我修改過ollama的端口,所以我沒辦法使用默認的端口,需要單獨設置調用的url。
spring.application.name=demo
server.port=8080
ai.ollama.api-host=http://localhost:8000
創建請求體:
// 創建請求參數
  ChatCompletion chatCompletion = ChatCompletion.builder()
         .model("deepseek-r1:7b")
         .message(ChatMessage.withUser(question))
         .build();
直接返回就調用chatCompletion方法:
// 發送chat請求
ChatCompletionResponse chatCompletionResponse = chatService.chatCompletion(chatCompletion);
流式放回就調用chatCompletionStream方法:
// 發送chat請求
chatService.chatCompletionStream(chatCompletion, sseListener);
流式的話他是以SSE端點的形式去獲取數據,所以需要你實現一個SSE監聽器去打印和發送數據給前端。
以下是完整的后端接口:
@RestController
@CrossOrigin
public class OllamChatController {
    // 注入Ai服務
    @Autowired
    private AiService aiService;

    @GetMapping("/chat")
    public String getChatMessage(@RequestParam String question) throws Exception {
        // 獲取OLLAMA的聊天服務
        IChatService chatService = aiService.getChatService(PlatformType.OLLAMA);
        // 創建請求參數
        ChatCompletion chatCompletion = ChatCompletion.builder()
               .model("deepseek-r1:7b")
               .message(ChatMessage.withUser(question))
               .build();
        System.out.println(chatCompletion);
        // 發送chat請求
        ChatCompletionResponse chatCompletionResponse = chatService.chatCompletion(chatCompletion);
        // 獲取聊天內容和token消耗
        String content = chatCompletionResponse.getChoices().get(0).getMessage().getContent();
        long totalTokens = chatCompletionResponse.getUsage().getTotalTokens();
        System.out.println("總token消耗: " + totalTokens);
        return content;
    }

    @GetMapping(path = "/chat-stream", produces = MediaType.TEXT_EVENT_STREAM_VALUE)
    public Flux<ServerSentEvent<String>> chatStream(@RequestParam String question) {
        Logger logger = LoggerFactory.getLogger(getClass());
        return Flux.create(emitter -> {
            try {
                logger.info("開始進行Chat對話: {}", question);
                // 獲取chat服務實例
                IChatService chatService = aiService.getChatService(PlatformType.OLLAMA);
                logger.info("成功創建服務實例");
                // 構造請求參數
                ChatCompletion chatCompletion = ChatCompletion.builder()
                        .model("deepseek-r1:7b")
                        .messages(Arrays.asList(ChatMessage.withUser(question)))
                        .functions()
                        .build();
                logger.info("成功構建流式請求體");
                // 構造監聽器
                SseListener sseListener = new SseListener() {
                    @Override
                    protected void send() {
                        try {
                            // 將消息發送到前端
                            String data = this.getCurrStr();
                            if (data != null && !data.isEmpty()) {
                                emitter.next(ServerSentEvent.<String>builder()
                                        .data(data)
                                        .build());
                            }
                        } catch (Exception e) {
                            logger.error("SSE端點報錯", e);
                            emitter.error(e);
                        }
                    }
                };
                // 顯示函數參數,默認不顯示
                sseListener.setShowToolArgs(true);
                // 發送SSE請求
                chatService.chatCompletionStream(chatCompletion, sseListener);
                logger.info("成功請求SSE端點");
            } catch (Exception e) {
                logger.error("流式輸出報錯", e);
                emitter.error(e);
            }
        });
    }


}
流式的話,我們再寫個前端來看看測試效果。
<!DOCTYPE html>
<html lang="en">
<head>
<meta charset="UTF-8">
<meta name="viewport" content="width=device-width, initial-scale=1.0">
<title>Chat Stream Frontend</title>
</head>
<body>
<input type="text" id="questionInput" placeholder="請輸入問題">
<button id="sendButton">發送</button>
<div id="responseContainer"></div>
<script>
const questionInput = document.getElementById('questionInput');
const sendButton = document.getElementById('sendButton');
const responseContainer = document.getElementById('responseContainer');
sendButton.addEventListener('click', () => {
const question = questionInput.value;
if (question.trim() === '') {
alert('請輸入問題');
return;
}
// 創建 EventSource 實例,連接到后端的 SSE 接口
const eventSource = new EventSource(`http://localhost:8080/chat-stream?question=${encodeURIComponent(question)}`);
// 監聽 message 事件,當接收到服務器發送的消息時觸發
eventSource.onmessage = (event) => {
const data = event.data;
// 將接收到的數據追加到響應容器中
responseContainer.textContent += data;
};
// 監聽 error 事件,當連接出現錯誤時觸發
eventSource.onerror = (error) => {
console.error('EventSource failed:', error);
// 關閉連接
eventSource.close();
};
});
</script>
</body>
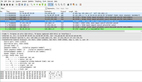
</html>運行服務,打開html,在輸入框輸入一個問題,點擊按鈕發送,在F12的接口請求里,你會在Response里看到服務不斷的推送文字給你。
 圖片
圖片