一個簡單的車輛目標檢測和跟蹤示例
介紹
目標檢測:目標檢測是指在圖像或視頻幀中識別和定位特定目標,并使用邊界框來確定它們的位置。YOLO(You Only Look Once)是一種高效的單階段目標檢測算法,以其快速的處理速度和較高的準確性而聞名。與傳統的兩階段檢測算法相比,YOLO的優勢在于它能夠一次性處理整個圖像,從而實現實時目標檢測,這在自動駕駛、視頻監控和機器人導航等應用中尤為重要。
目標跟蹤:目標跟蹤則關注于在視頻序列中連續跟蹤已識別的目標。SORT(Simple Online and Realtime Tracking)算法因其簡單性和實時性而被廣泛應用于目標跟蹤任務。其通過預測目標的運動軌跡并實時更新其位置,有效實現了目標的連續跟蹤。結合YOLO進行檢測和SORT進行跟蹤,可以實現目標的連續監控和分析,確保在整個視頻序列中的準確和一致的跟蹤。項目 我們將使用YOLOv8m(中等版本)、OpenCV和SORT進行目標檢測,以確保準確性和效率,來計算通過我們視頻中特定區域的車輛數量。

項目簡介
本項目旨在通過結合使用YOLOv8m(一種中等復雜度的YOLO變體)、OpenCV(一個開源的計算機視覺庫)和SORT算法,實現對視頻中特定區域內通過的車輛數量的準確計算。這一過程不僅確保了目標檢測的準確性,也提高了整個系統的效率。
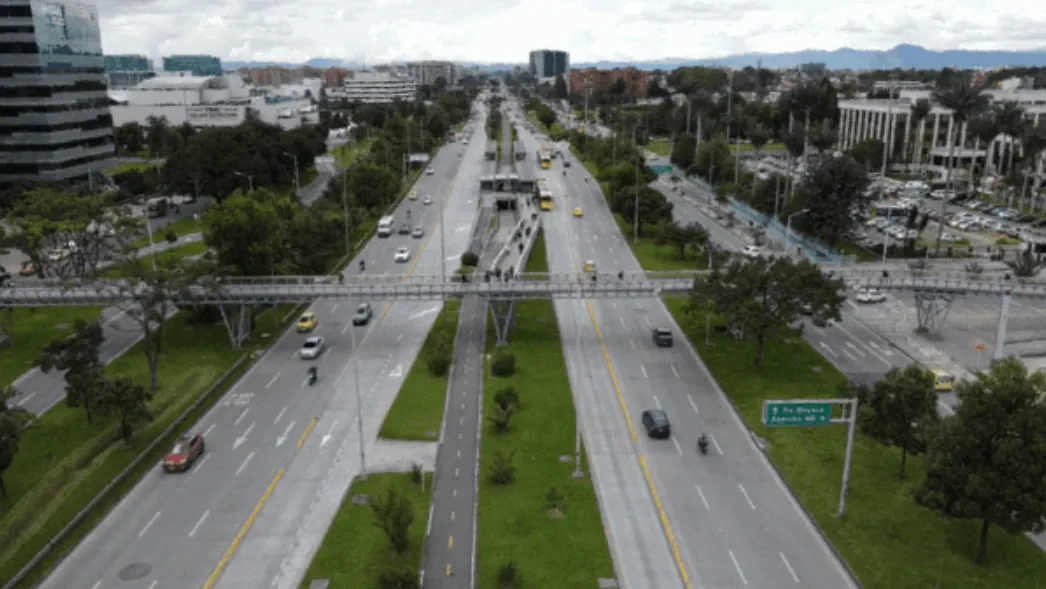
1. 選擇一個視頻
2. 創建掩膜
為了專注于橋下的車輛,我們將利用畫布創建一個掩膜。掩膜是一個二值圖像,僅包含黑色(0)和白色(255)兩種像素值。在RGB色彩空間中,這對應于:
- 白色(255, 255, 255)表示感興趣的區域,算法將在這些區域進行處理。
- 黑色(0, 0, 0)表示要忽略或排除在處理之外的區域。
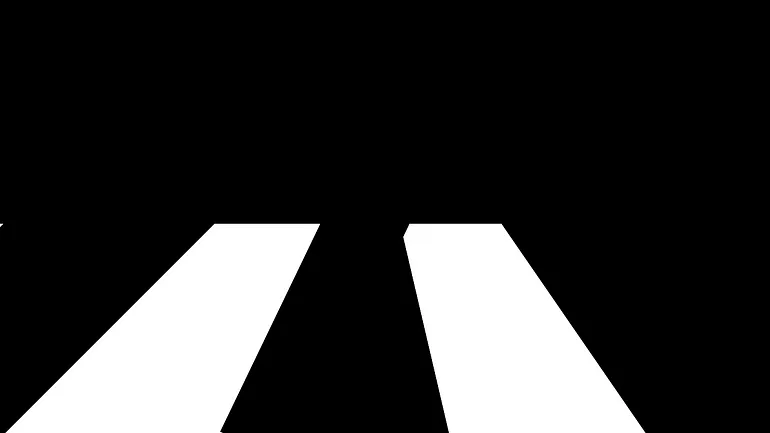
通過按位操作將掩膜與視頻結合,我們實現以下結果:
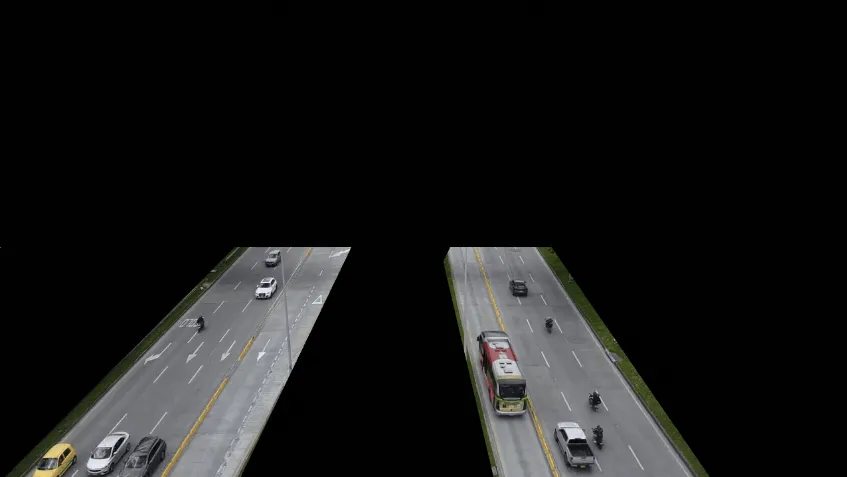
3. 定義一個區域
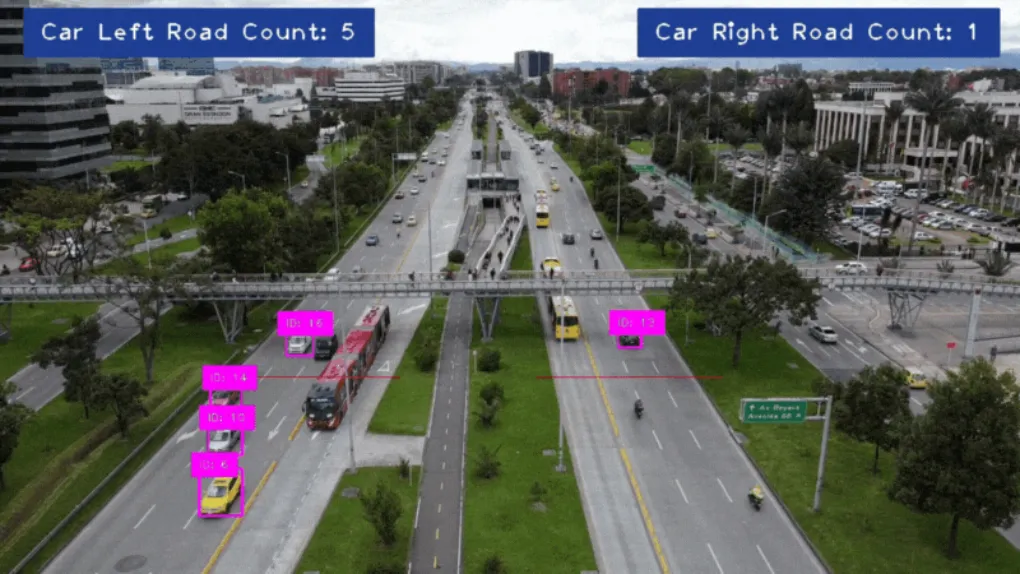
我們將在視頻中定義兩個區域:一個用于計算向下行駛的車輛數量,另一個用于計算向上行駛的車輛數量。

當在指定區域內識別到車輛時,我們將改變該區域的顏色為綠色,表示檢測到車輛。

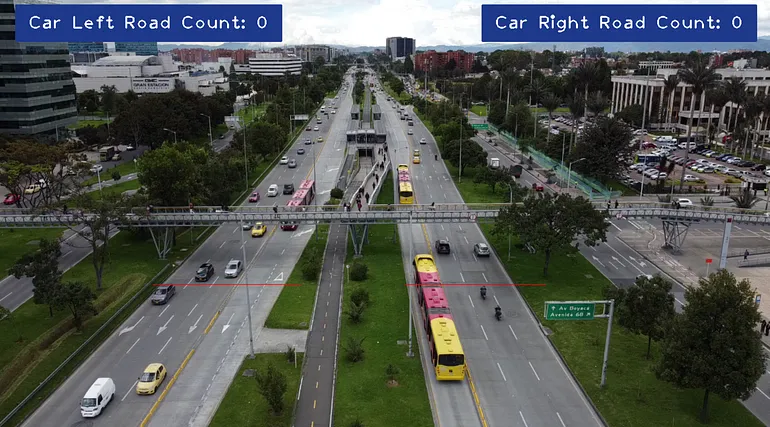
4. 構建布局
讓我們使用cvzone構建計數器的布局。
5. 代碼
- cv2:執行圖像和視頻處理
- cvzone:與OpenCV協同工作
- numpy:處理數值運算
- YOLO:應用目標檢測
- sort:用于跟蹤檢測到的目標的SORT庫
import cv2
import numpy as np
from ultralytics import YOLO
import cvzone
from sort import sort

class_names = [
  'person', 'bicycle', 'car', 'motorcycle', 'airplane', 'bus', 'train', 'truck', 'boat', 'traffic light', 'fire hydrant', 'stop sign', 'parking meter', 'bench',
  'bird', 'cat', 'dog', 'horse', 'sheep', 'cow', 'elephant', 'bear', 'zebra', 'giraffe', 'backpack', 'umbrella', 'handbag', 'tie', 'suitcase', 'frisbee', 'skis',
  'snowboard', 'sports ball', 'kite', 'baseball bat', 'baseball glove', 'skateboard', 'surfboard', 'tennis racket', 'bottle', 'wine glass', 'cup', 'fork', 'knife',
  'spoon', 'bowl', 'banana', 'apple', 'sandwich', 'orange', 'broccoli', 'carrot', 'hot dog', 'pizza', 'donut', 'cake', 'chair', 'couch', 'potted plant', 'bed',
  'dining table', 'toilet', 'tv', 'laptop', 'mouse', 'remote', 'keyboard', 'cell phone', 'microwave', 'oven', 'toaster', 'sink', 'refrigerator', 'book', 'clock',
  'vase', 'scissors', 'teddy bear', 'hair drier', 'toothbrush'
]

class_names_goal = ['car']

model = YOLO('yolov8m.pt')
tracker = sort.Sort(max_age=20)

mask = cv2.imread('mask.png')

video = cv2.VideoCapture('traffic.mp4')

width = 1280
height = 720

line_left_road_x1 = 256
line_left_road_x2 = 500
line_left_road_y = 472

line_right_road_x1 = 672
line_right_road_x2 = 904
line_right_road_y = 472

vehicle_left_road_id_count = []
vehicle_right_road_id_count = []

while True:
  success, frame = video.read()

  if not success:
    break

  frame = cv2.resize(frame, (width, height))

  image_region = cv2.bitwise_and(frame, mask)

  results = model(image_region, stream=True)

  detections = []

  cv2.line(frame, (line_left_road_x1, line_left_road_y) ,(line_left_road_x2, line_left_road_y), (0, 0, 255))
  cv2.line(frame, (line_right_road_x1, line_right_road_y) ,(line_right_road_x2, line_right_road_y), (0, 0, 255))

  for result in results:
    for box in result.boxes:
      class_name = class_names[int(box.cls[0])]

      if not class_name in class_names_goal:
        continue

      confidence = round(float(box.conf[0]) * 100, 2)

      if confidence < 30:
        continue

      x1, y1, x2, y2 = box.xyxy[0]
      x1, y1, x2, y2 = int(x1), int(y1), int(x2), int(y2)

      detections.append([x1, y1, x2, y2, float(box.conf[0])])

    tracked_objects = tracker.update(np.array(detections))

    for obj in tracked_objects:
      x1, y1, x2, y2, obj_id = [int(i) for i in obj]

      confidence_pos_x1 = max(0, x1)
      confidence_pos_y1 = max(36, y1)

      cv2.rectangle(frame, (x1, y1), (x2, y2), (255, 0, 255), 2)
      cvzone.putTextRect(frame, f'ID: {obj_id}', (confidence_pos_x1, confidence_pos_y1), 1, 1)

      center_x = (x1 + x2) // 2
      center_y = (y1 + y2) // 2

      if  line_left_road_y - 10 < center_y < line_left_road_y + 10 and line_left_road_x1 < center_x < line_left_road_x2:
        if not obj_id in vehicle_left_road_id_count:
          vehicle_left_road_id_count.append(obj_id)

          cv2.line(frame, (line_left_road_x1, line_left_road_y) ,(line_left_road_x2, line_left_road_y), (0, 255, 0), 2)

      if  line_right_road_y - 10 < center_y < line_right_road_y + 10 and line_right_road_x1 < center_x < line_right_road_x2:
        if not obj_id in vehicle_right_road_id_count:
          vehicle_right_road_id_count.append(obj_id)

          cv2.line(frame, (line_right_road_x1, line_right_road_y) ,(line_right_road_x2, line_right_road_y), (0, 255, 0), 2)

  cvzone.putTextRect(frame, f'Car Left Road Count: {len(vehicle_left_road_id_count)}', (50, 50), 2, 2, offset=20, border=2, colorR=(140, 57, 31), colorB=(140, 57, 31))
  cvzone.putTextRect(frame, f'Car Right Road Count: {len(vehicle_right_road_id_count)}', (width - 460, 50), 2, 2, offset=20, border=2, colorR=(140, 57, 31), colorB=(140, 57, 31))

  cv2.imshow('Image', frame)

  if cv2.waitKey(1) & 0xFF == ord('q'):
    break

video.release()
cv2.destroyAllWindows()
6. 結果
源碼:https://github.com/VladeMelo/collaborative-filtering