OpenHarmony BLE低功耗藍牙

目標:實現BLE藍牙設備與DAYU200設備之間數據交互,即中心設備接收外圍設備的通知數據,OpenHarmony社區提供了詳細的API文檔,可以移步到:??藍牙??
之前在HarmonyOS系統上實現了BLE藍牙的連接與數據傳輸,??《鴻蒙BLE藍牙通信開發總結》??,現在需要在OpenHarmony上也實現BLE藍牙的通信。
設備與環境
設備:BLE藍牙設備、DAYU200設備
系統:OpenHarmony 3.2 beta1
SDK:9
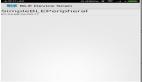
先看下效果
??查看視頻??

說在前面的話
如果你需要了解藍牙的基礎知識,可以查看??《鴻蒙BLE藍牙通信開發總結》??這篇文章的“藍牙介紹”部分。
前置步驟
創建項目
說明:創建項目的過程比較簡單,注意在選擇SDK 9的版本,使用Stage模型,如下:


業務邏輯梳理
1、權限問題,首先需要注冊藍牙相關權限。
2、搜索藍牙,應用啟動后可以手動的開啟和關閉藍牙掃描。
3、連接藍牙,根據藍牙的mac地址,調用connect進行連接。
4、遍歷藍牙特征,在藍牙連接成功后,獲取藍牙的服務特征,設置指定GATT特征通知。
5、通知數據,將數據通過藍牙服務中的通知屬性發送。
6、接受通知,中心設備通過characteristicChangedEvent接收通知數據,并顯示在屏幕上。
7、斷開藍牙,根據需要斷開連接的藍牙。
8、關閉藍牙,在應用退出,需要結束掃描,釋放資源。
開發實踐
1、申請權限
開發之前,通過API文檔可以指導,需要實現目標需要獲得以下權限:
- ohos.permission.USE_BLUETOOTH // 允許應用查看藍牙的配置。
- ohos.permission.DISCOVER_BLUETOOTH // 允許應用配置本地藍牙,查找遠端設備且與之配對連接。
- ohos.permission.LOCATION // 允許應用獲取設備位置信息。
- ohos.permission.MANAGE_BLUETOOTH // 允許應用配對藍牙設備,并對設備的電話簿或消息進行訪問。
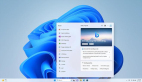
以上權限中ohos.permission.MANAGE_BLUETOOTH級別是system_basic,此權限在應用打包簽名時需要在UnsgnedReleasedProfileTemplate.json文件中的acls字段下添加此權限,否則安裝時會出現:Failed due to grant request permissions failed,如下代碼:
"acls": {
    "allowed-acls": [
      "ohos.permission.MANAGE_BLUETOOTH"
    ]
  }
如下圖:

應用開發時,將需要申請的權限在modele.json5文件中聲明,權限相關的說明可以查看:??應用權限列表??
"requestPermissions": [
      {
        "name": "ohos.permission.USE_BLUETOOTH",
        "reason": "$string:grant_use_bluetooth",
        "usedScene": {
          "abilities": [
            "MainAbility"
          ],
          "when": "inuse"
        }
      },
      {
        "name": "ohos.permission.DISCOVER_BLUETOOTH",
        "reason": "$string:grant_discovery_bluetooth",
        "usedScene": {
          "abilities": [
            "MainAbility"
          ],
          "when": "inuse"
        }
      },
      {
        "name": "ohos.permission.LOCATION",
        "reason": "$string:grant_location",
        "usedScene": {
          "abilities": [
            "MainAbility"
          ],
          "when": "inuse"
        }
      },
      {
        "name": "ohos.permission.MANAGE_BLUETOOTH",
        "reason": "$string:grant_manage_bluetooth",
        "usedScene": {
          "abilities": [
            "MainAbility"
          ],
          "when": "inuse"
        }
      }
    ]
2、打開并搜索藍牙
- 打開藍牙并監聽藍牙狀態
let result:boolean = bluetooth.enableBluetooth() // 開啟藍牙
- 監聽藍牙狀態(開啟或關閉)
/***
   * 添加監聽器
   */
  addBlueListener() {
    // 訂閱藍牙連接狀態改變事件。
    let self = this
    bluetooth.on('stateChange', (data) => {
      logger.info(TAG, `enter on stateChange`)
      // 藍牙打開
      if (data === bluetooth.BluetoothState.STATE_ON) {
        logger.info(TAG, `enter BluetoothState.STATE_ON`)
        self.startBleScan()
      }
      // 藍牙關閉
      if (data === bluetooth.BluetoothState.STATE_OFF) {
        logger.info(TAG, `enter BluetoothState.STATE_OFF`)
        self.disconnect()
        self.stopBleScan()
        bluetooth.stopBluetoothDiscovery() // 關閉藍牙掃描
        self.mDeviceName = ''
        self.mDeviceRower = ''
        self.discoveryList = []
      }
      logger.info(TAG, `BluetoothState = ${JSON.stringify(data)}`)
    })
  }
點擊藍牙開關,進行開啟和關閉藍牙操作,程序啟動后會先自動檢測系統藍牙是否開啟,如果開啟則打開藍牙開關,默認狀態下關閉藍牙。藍牙被開啟后會進入藍牙掃描。目前主要針對BLE低功耗藍牙進行操作,所以這里只開啟BLE藍牙掃描,下面說到的藍牙相關操作,都是指BLE藍牙。
- 獲取藍牙狀態
接口 | 說明 | 返回值 |
bluetooth.getState | 獲取藍牙開關狀態。 | BluetoothState 藍牙開關狀態。 |
import bluetooth from '@ohos.bluetooth';

let state = bluetooth.getState()
    if (state === bluetooth.BluetoothState.STATE_ON) {
      this.isOn = true
      // 針對BLE藍牙
      this.startBleScan() // 發現BLE藍牙
    }
    if (state === bluetooth.BluetoothState.STATE_OFF) {
      this.isOn = false
    }
啟動BLE藍牙掃描,并注冊“BLEDeviceFiind”藍牙監聽器,用于接收掃描到藍牙,為了方便調試我這里只將需要的藍牙設備過濾出來。掃描出來的藍牙狀態默認為:未連接
參數名 | 類型 | 必填 | 說明 |
filters | Array<ScanFilter> | 是 | 表示掃描結果過濾策略集合,如果不使用過濾的方式,該參數設置為null。 |
options | ScanOptions | 否 | 表示掃描的參數配置,可選參數。 |
參數名 | 類型 | 必填 | 說明 |
type | string | 是 | 填寫"BLEDeviceFind"字符串,表示BLE設備發現事件。 |
callback | Callback<Array<ScanResult>> | 是 | 表示回調函數的入參,發現的設備集合。回調函數由用戶創建通過該接口注冊。 |
/**
   * 開啟BLE藍牙掃描
   * @param data
   */
  startBleScan() {
    logger.info(TAG, `startBleScan`)
    bluetooth.BLE.on('BLEDeviceFind', this.onBLEDeviceFind)
    bluetooth.BLE.startBLEScan([{
                                  deviceId: DEVICE_MAC
                                }])
  }
  onBLEDeviceFind = (scanResult: Array<bluetooth.ScanResult>) => {
    let self = this
    //    logger.info(TAG, `BLE scan device find result= ${JSON.stringify(scanResult)}`)
    if (typeof (scanResult) === 'undefined' || scanResult.length <= 0) {
      return
    }
    for (let result of scanResult) {
      let temp: string = result.deviceId
      //  只過濾需要的設備
      if (DEVICE_MAC !== temp) {
        break
      }
      if (!self.isExistDevice(self.discoveryList, temp)) {
        self.createBleBlueInfo(temp, result.rssi).then((info) => {
          logger.info(TAG, `BLE scan device find,add = ${JSON.stringify(info)}`)
          // 連續兩次發送相同的廣播,時間間隔5ms,過濾極短時間發現的設備
          let curTime: number = Date.now()
          let diff: number = curTime - self.mLastFindDeviceTime
          logger.info(TAG, `BLE scan device find,Time diff = ${diff} curTime=${curTime}  mLastFindDeviceTime=${self.mLastFindDeviceTime}`)
          if (diff > 5) {
            logger.info(TAG, `BLE scan device find,Time is less than 5 ms, so back`)
            self.discoveryList.push(info)
          }
          this.mLastFindDeviceTime = curTime
        });
      } else {
        let curBlueInfo: baseInfo = self.getBlueInfoByDeviceId(self.discoveryList, temp)
        if (curBlueInfo !== null) {
          curBlueInfo.deviceRssi = result.rssi
          logger.info(TAG, `BLE scan device find,update rssi = ${curBlueInfo.deviceRssi}`)
          let index: number = self.getIndexByDeviceId(self.discoveryList, temp)
          if (index >= 0) {
            self.discoveryList.splice(index, 1)
            logger.info(TAG, `BLE scan device find,delete index= ${index}`)
            self.discoveryList.push(curBlueInfo)
            logger.info(TAG, `BLE scan device find,add new info = ${JSON.stringify(curBlueInfo)}`)
          }
        }
      }
    }
  }
問題1:在bluetooth.BLE.startBLEScan()接口中傳遞需要過濾的deviceId,但是無效,問題已向社區反饋,如果有興趣可以關注相關 ??issues??
3、連接藍牙
點擊列表中的藍牙信息,根據當前的狀態發起藍牙連接,涉及的接口:??GattClientDevice.connect()??。
返回值:
類型 | 說明 |
boolean | 連接操作成功返回true,操作失敗返回false。 |
this.mGattClientDevice = bluetooth.BLE.createGattClientDevice(deviceId)
let connectStatus = this.mGattClientDevice.connect()
logger.info(TAG, `BLE Device connect = ${connectStatus}`)
4、獲取藍牙服務,遍歷藍牙特征
通過GattClientDevice.on(type: “BLEConnectionStateChange”, callback: Callback<BLEConnectChangedState>)注冊藍牙連接狀態變化監聽器,獲取藍牙連接狀態,當藍牙連接成功,則通過GattClientDevice.getServices() 獲取藍牙支持的服務,這里提醒一句,獲取服務需要耗時3秒左右,通過藍牙服務設置readCharacteristicValue()、writeCharacteristicValue()、setNotifyCharacteristicChanged()、on(‘BLECharacteristicChange’) 來完成對藍牙的讀、寫、監聽特征值變化的操作。
- 通過GattClientDevice.getServices()
// BLE藍牙連接成功,獲取當前BLE藍牙的服務
        this.mGattClientDevice.getServices().then((result: Array<bluetooth.GattService>) => {
          logger.info(TAG, `BLE Device getServices successfully`)
          for (let blueService of result) {
            logger.info(TAG, `BLE Device blue ${connectDeviceId} Service uuid=${blueService.serviceUuid}`)
            if (SERVICE_UUID === blueService.serviceUuid) {
              let curCharacteristics = blueService.characteristics
              for (let characteristic of curCharacteristics) {
                logger.info(TAG, `BLE Device characteristic= ${JSON.stringify(characteristic)}`)
                if (NOTIFY_UUID === characteristic.characteristicUuid) {
                  self.mNotifyCharacteristic = characteristic
                  self.blueSetNotifyCharacteristicChanged()
                } else if (WRITE_UUID === characteristic.characteristicUuid) {
                  self.mWriteCharacteristic = characteristic
                  logger.info(TAG, `BLE Device blue send : 獲得WriteCharacteristic `)
                  // 延遲500ms再向藍牙設備發送獲取設備信息消息,防止未注冊消息通知導致無法收到
                  setTimeout(() => {
                    self.getDeviceInfo()
                  }, 100)
                }
              }
            }
            // todo 使用ReadCharacteristic 時會導致WriteCharacteristic、NotifyCharacteristic失敗,這里先注釋
            //            else if (SERVICE_BATTERY_UUID === blueService.serviceUuid) {
            //              // 監聽BLE設備主動發送的消息
            //              let curCharacteristics = blueService.characteristics
            //              for (let characteristic of curCharacteristics) {
            //                logger.info(TAG, `BLE Device characteristic2= ${JSON.stringify(characteristic)}`)
            //                if (LEVEL_BATTERY_UUID === characteristic.characteristicUuid) {
            //                  self.mReadCharacteristic = characteristic
            //                  self.blueSetReadCharacteristic()
            //                }
            //              }
            //            }
          }
        });
      } else if (connectState === bluetooth.ProfileConnectionState.STATE_DISCONNECTED) {
        // 斷開連接
        this.refreshBleConnect(connectDeviceId, STATE.DISCONNECT)
        this.mDeviceName = ''
        this.mDeviceRower = ''
      } else if (connectState === bluetooth.ProfileConnectionState.STATE_CONNECTING) {
        // 連接中
        this.refreshBleConnect(connectDeviceId, STATE.CONNECTING)
        this.mDeviceName = ''
        this.mDeviceRower = ''
      }
    })
5、向低功耗藍牙設備寫入特定的特征值
通過步驟4可以獲取到BLECharacteristic,調用:GattClientDevice.writeCharacteristicValue() 就可以向低功耗藍牙設備寫入特定的特征值。
blueWriteCharacteristicValue(str: string) {
    if (this.mWriteCharacteristic === null) {
      return
    }
    let strUpper: string = str.toUpperCase()
    let temp: string = HexUtil.stringToHex(strUpper)
    let dataPacket: string = HexUtil.getWriteDataPacket(temp)
    let data: Uint8Array = HexUtil.hexStringToBytes2(dataPacket)
    this.mWriteCharacteristic.characteristicValue = data.buffer
    let success: boolean = this.mGattClientDevice.writeCharacteristicValue(this.mWriteCharacteristic)
    logger.info(TAG, `BLE Device WriteCharacteristicValue  success =${success}`)
  }
6、接受通知
向服務端發送設置通知此特征值請求:setNotifyCharacteristicChanged(characteristic: BLECharacteristic, enable: boolean)。
blueSetNotifyCharacteristicChanged() {
    logger.info(TAG, `BLE Device SetNotifyCharacteristicChanged`)
    let success1: boolean = this.mGattClientDevice.setNotifyCharacteristicChanged(this.mNotifyCharacteristic, true)
    logger.info(TAG, `BLE Device SetNotifyCharacteristicChanged success1=${success1}`)
    logger.info(TAG, `BLE Device blue send :  注冊通知監聽器 success1 =${success1}`)
    if (success1) {
      this.onBLECharacteristicChange()
      let descriptor: bluetooth.BLEDescriptor = this.getDescriptor(this.mNotifyCharacteristic, this.mNotifyCharacteristic.characteristicUuid);
      if (descriptor != null) {
        descriptor.descriptorValue = new Uint8Array(this.ENABLE_NOTIFICATION_VALUE).buffer
        let success2: boolean = this.mGattClientDevice.writeDescriptorValue(descriptor)
        logger.info(TAG, `BLE Device SetNotifyCharacteristicChanged success2=${success2}`)
      } else {
        logger.info(TAG, `BLE Device SetNotifyCharacteristicChanged descriptor is null`)
      }
    }
}- 訂閱藍牙低功耗設備的特征值變化事件:GattClientDevice.on(type: “BLECharacteristicChange”, callback: Callback<BLECharacteristic>)。
/**
   *訂閱藍牙低功耗設備的特征值變化事件。
   * 需要先調用setNotifyCharacteristicChanged接口才能接收server端的通知。
   * @param deviceId
   */
  onBLECharacteristicChange() {
    this.mGattClientDevice.on('BLECharacteristicChange', (data: bluetooth.BLECharacteristic) => {
      let serviceUuid = data.serviceUuid;
      let characteristicUuid = data.characteristicUuid;
      logger.info(TAG, `BLE Device data on BLECharacteristicChange ${serviceUuid}, ${characteristicUuid}`)
      let characteristicValue:ArrayBuffer = data.characteristicValue
      if (characteristicValue !== null && typeof(characteristicValue) === 'undefined') {
        return
      }
      let valueTemp = HexUtil.ab2hex(characteristicValue);
      let value = HexUtil.filterValue(valueTemp)
      let temp: string = HexUtil.hexToString(value)
      let tempStrs: string[] = temp.split(',')
      let count: number = tempStrs.length
      let curStr: string = tempStrs[count - 1] + '\n'
      // 解析設備基礎信息
      this.analysisDeviceInfo(curStr)
      // 解析設備電量信息
      this.analysisRower(curStr)
      if (this.filterResult(curStr)) {
        return
        }
      this.mScanStr = curStr + '' + this.mScanStr
    })
  }
問題1:監聽多服務通道特征通知會導致異常,相關??issues??。
7、斷開藍牙
藍牙連接成功后,點擊藍牙列表中的藍牙信息,彈窗窗口提示用戶需要斷開藍牙,點擊"確定"則斷開藍牙,涉及的接口:GattClientDevice.disconnect()。
- 提示彈窗
AlertDialog.show({
          title: $r('app.string.disconnect'),
          message: '此操作將會斷開您與以下設備的連接:' + ((typeof (blue.deviceName) !== 'undefined') ? blue.deviceName : blue.deviceId),
          primaryButton: {
            value: $r('app.string.cancel'),
            action: () => {
            }
          },
          secondaryButton: {
            value: $r('app.string.confirm'),
            action: () => {
              this.disconnectBlue(blue)
            }
          }
})- 斷開藍牙
/**
   * 斷開藍牙
   * @param blue
   */
  disconnectBlue(blue: baseInfo) {
    logger.info(TAG, `disconnectBlue info = ${JSON.stringify(blue)}`)
    if (blue === null || typeof (this.mGattClientDevice) === 'undefined') {
      return
    }
    let deviceId: string = blue.deviceId
    let ret = this.mGattClientDevice.disconnect()
    logger.info(TAG, `BLE Device ${deviceId} disconnect Status = ${ret}`)
    if (ret === true) {
      this.removeBlueDevice(deviceId)
      this.mGattClientDevice = null
    } else {
      this.showToast('斷開藍牙失敗')
    }
  }
8、關閉藍牙
關閉藍牙后,會通知再2.1中藍牙關閉狀態的回調
let result:boolean = bluetooth.disableBluetooth()
到此BLE低功耗藍牙的整體流程就介紹完畢,如果有什么問題,可以在評論區留言。
問題與思考
1、BLE藍牙創建加密通信通道時需要進行綁定,目前SDK9的版本上還不支持,只能使用不綁定的方式進行通信。相關 ??issues??。
補充代碼
UI
build() {
    Column() {
      Stack({ alignContent: Alignment.Top }) {
        Image($r('app.media.top_bg'))
          .objectFit(ImageFit.Cover)
        Row() {
          Text(this.mDeviceName)
            .width('30%')
            .fontColor('#71fbfd')
            .align(Alignment.Center)
            .textAlign(TextAlign.Center)
            .fontSize(32)
            .margin({
              bottom: '15%'
            })
          Image($r('app.media.project_hr22'))
            .objectFit(ImageFit.Contain)
            .width('30%')
            .onClick(() => {
              this.onClickDevice()
            })
          Text(`電量 ${this.mDeviceRower}%`)
            .width('30%')
            .margin({
              top: '20%'
            })
            .fontColor('#71fbfd')
            .align(Alignment.Center)
            .textAlign(TextAlign.Center)
            .fontSize(24)
        }
        .alignItems(VerticalAlign.Center)
        .justifyContent(FlexAlign.Center)
        .width('100%')
        .height('100%')
      }
      .width('100%')
      .height('40%')

      Divider()
        .vertical(false)
        .color('#fc3811')
        .strokeWidth(5)

      Column() {
        Row() {
          Column() {
            Text($r('app.string.bluetooth'))
              .fontSize(30)
              .alignSelf(ItemAlign.Start)
            if (true === this.isOn) {
              Row() {
                Text($r('app.string.discovery'))
                  .fontSize(20)
                  .alignSelf(ItemAlign.Start)
                  .margin({
                    top: '10'
                  })

                LoadingProgress()
                  .color(Color.Grey)
                  .width(30)
                  .height(30)
                  .align(Alignment.Center)
                  .margin({
                    left: 10
                  })
              }
              .height(40)
            }
          }.margin({ top: 20, bottom: 20 })

          Blank() // 空白填充

          Column() {
            Toggle({ type: ToggleType.Switch, isOn: this.isOn })
              .selectedColor('#ff2982ea')
              .key('toggleBtn')
              .onChange((isOn: boolean) => {
                if (isOn) {
                  this.isOn = true
                  let result:boolean = bluetooth.enableBluetooth() // 開啟藍牙
                  logger.info(TAG, `enable Bluetooth ${result}`)
                } else {
                  this.isOn = false
                  let result:boolean = bluetooth.disableBluetooth()
                  logger.info(TAG, `disable Bluetooth ${result}`)
                }
              })
          }
        }.width('100%')

        if (this.isOn) {
          Divider()
            .width('100%')
            .vertical(false)
            .color('#a3a4a7')
            .strokeWidth(1)
            .margin({
              bottom: '1%'
            })
        }
        Column() {
          ForEach(this.discoveryList, (item: baseInfo) => {
            Row() {
              Image(item.state === STATE.CONNECTED ? $r('app.media.blue_connect') :
                (item.state === STATE.CONNECTING ? $r('app.media.blue_connecting') : $r('app.media.blue_disconnect')))
                .width(45)
                .height(45)
                .objectFit(ImageFit.Cover)
                .margin({
                  right: '1%'
                })
              Column() {
                Text(item.deviceName)
                  .width('100%')
                  .fontSize(22)
                  .margin({
                    top: '2%',
                    bottom: '2%'
                  })
                Row() {
                  Text(item.deviceId)
                    .fontSize(16)
                  Text(item.deviceRssi.toString())
                    .fontSize(16)
                    .margin({
                      left: '5%'
                    })
                }
                .width('100%')
                .margin({
                  bottom: '2%'
                })
              }
            }
            .justifyContent(FlexAlign.Start)
            .alignSelf(ItemAlign.Start)
            .width('100%')
            .key('pairedDevice')
            .onClick(() => {
              this.onClickBlueItem(item)
            })
          })
        }
      }
      .width('90%')
      .padding({ top: 10, left: 30, right: 30, bottom: 10 })
      .margin({ top: 20, bottom: 20 })
      .backgroundColor(Color.White)
      .borderRadius(20)
      .borderWidth(1)
      .borderColor('#a3a4a7')
      Column() {
        Scroll(this.scroller) {
          Column() {
            Text(this.mScanStr)
              .width('100%')
              .fontSize(18)
              .lineHeight(30)
              .align(Alignment.Start)
          }
          .width('100%')
          .padding({
            left: '20',
            right: '20'
          })
          .alignSelf(ItemAlign.Start)
          .justifyContent(FlexAlign.Start)
        }
        .scrollable(ScrollDirection.Vertical)
        .scrollBarColor(Color.Gray)
        .scrollBar(BarState.Auto)
        .scrollBarWidth(10)
        .width('90%')
        .height('20%')
      }
      .padding({
        left: '20',
        right: '20',
        top: '20',
        bottom: '20'
      })
      .margin({
        bottom: '20'
      })
      .border({
        width: 1,
        color: '#a3a4a7'
      })
      .borderRadius(30)
      .backgroundColor(Color.White)


      Button('清除')
        .width('90%')
        .height(60)
        .backgroundColor('#fc3811')
        .fontSize(24)
        .onClick(() => {
          this.mScanStr = ''
        })
    }
    .width('100%')
    .height('100%')
    .backgroundColor('#dcdcdc')
  }
數據轉換工具:HexUtil
import TextUtils from './TextUtils'

type char = string;
type byte = number;

export default class HexUtil {
  private static readonly DIGITS_LOWER: char[] = ['0', '1', '2', '3', '4', '5',
  '6', '7', '8', '9', 'a', 'b', 'c', 'd', 'e', 'f'];
  private static readonly DIGITS_UPPER: char[] = ['0', '1', '2', '3', '4', '5',
  '6', '7', '8', '9', 'A', 'B', 'C', 'D', 'E', 'F'];
  private static readonly UPDATE_HEAD: string = 'xxxxxxxx';
  private static readonly WRITE_PACKET_DATE_START: string = "xxxxxxxxx"; //發送數據固定起始數據域格式
  public static readonly WRITE_PACKET_DATE_END: string = "xxxx"; // 發送數據固定結束數據域格式
  public static readonly NOTIFY_DATE_START: string = "xxxxxxxx"; // 通知數據頭
  public static readonly NOTIFY_DATE_END: string = "xxxxxxxxx"; // 通知數據尾
  public static encodeHex(data: byte[], toLowerCase: boolean = true): char[] {
    return HexUtil.encodeHexInner(data, toLowerCase ? HexUtil.DIGITS_LOWER : HexUtil.DIGITS_UPPER);
  }
  protected static encodeHexInner(data: byte[], toDigits: char[]): char[] {
    if (!data)
    return null;
    let l: number = data.length;
    let out: char[] = new Array(l << 1);
    let index:number = 0
    for(let item of data) {
      index += 1
      out[index] = toDigits[(0xF0 & item) >>> 4]
      index += 1
      out[index] = toDigits[0x0F & item]
    }
    return out;
  }
  protected static encodeHexInner2(data: Uint8Array, toDigits: char[]): char[] {
    if (!data)
    return null;
    let l: number = data.length;
    let out: char[] = new Array(l << 1);
    let index:number = 0
    for(let item of data) {
      index += 1
      out[index] = toDigits[(0xF0 & item) >>> 4]
      index += 1
      out[index] = toDigits[0x0F & item]
    }
    return out;
  }
  private static byteToString(data: char[]): string {
    let str = '';
    for(let item of data) {
      str += item
    }
    return str;
  }
  public static encodeHexStr(data: byte[], toLowerCase: boolean = true): string{
    return HexUtil.encodeHexStrInner(data, toLowerCase ? HexUtil.DIGITS_LOWER : HexUtil.DIGITS_UPPER);
  }
  protected static encodeHexStrInner(data: byte[], toDigits: char[]): string {
    return HexUtil.byteToString(HexUtil.encodeHexInner(data, toDigits));
  }
  public static encodeHexStr2(data: Uint8Array, toLowerCase: boolean = true): string{
    return HexUtil.encodeHexStrInner2(data, toLowerCase ? HexUtil.DIGITS_LOWER : HexUtil.DIGITS_UPPER);
  }
  protected static encodeHexStrInner2(data: Uint8Array, toDigits: char[]): string {
    return HexUtil.byteToString(HexUtil.encodeHexInner2(data, toDigits));
  }
  public static formatHexString(data: Uint8Array, addSpace: boolean = false): string {
    if (!data || data.length < 1)
    return null;
    let sb: string = '';
    for (let item of data) {
      let hex: String = (item & 0xFF).toString(16);
      if (hex.length == 1) {
        hex = '0' + hex;
      }
      sb = sb + hex;
      if (addSpace)
      sb = sb + " ";
    }
    return sb;
  }
  public static decodeHex(data: char[]): byte[] {
    let len: number = data.length;

    if ((len & 0x01) != 0) {
      throw new Error("Odd number of characters.");
    }
    let out: byte[] = new Array(len >> 1);
    let i:number = 0
    let j:number = 0
    while(j < len) {
      let f : number = HexUtil.toDigit(data[j], j) << 4
      j += 1
      f = f | HexUtil.toDigit(data[j], j)
      j += 1
      out[i] = (f & 0xFF)
    }
    return out;
  }
  protected static toDigit(ch: char, index: number): number {
    let digit: number = HexUtil.charToByte(ch.toUpperCase()); //Character.digit(ch, 16);
    if (digit == -1) {
      throw new Error("Illegal hexadecimal character " + ch
      + " at index " + index);
    }
    return digit;
  }
  public static hexStringToBytes(hexString: string): Uint8Array {
    if (TextUtils.isEmpty(hexString)) {
      return null;
    }
    hexString = hexString.trim();
    hexString = hexString.toUpperCase();
    let length: number = hexString.length / 2;
    let hexChars: char[] = TextUtils.toCharArray(hexString);
    let d: byte[] = new Array(length);
    let index = 0
    while (index < length) {
      let pos = index * 2;
      d[index] = (HexUtil.charToByte(hexChars[pos]) << 4 | HexUtil.charToByte(hexChars[pos + 1]));
      index += 1
    }
    return new Uint8Array(d);
  }
  public static hexStringToBytes2(hexString: string): Uint8Array {
    if (TextUtils.isEmpty(hexString)) {
      return null;
    }
    hexString = hexString.trim();
    hexString = hexString.toUpperCase();
    let length: number = hexString.length / 2;
    let hexChars: char[] = TextUtils.toCharArray(hexString);
    let d: byte[] = new Array(length);
    let index = 0
    while (index < length) {
      let pos = index * 2;
      d[index] = (HexUtil.charToByte(hexChars[pos]) << 4 | HexUtil.charToByte(hexChars[pos + 1]));
      index += 1
    }
    return new Uint8Array(d);
  }
  public static charToByte(c: char): byte {
    return "0123456789ABCDEF".indexOf(c);
  }
  public static extractData(data: Uint8Array, position: number): String {
    return HexUtil.formatHexString(new Uint8Array([data[position]]));
  }
  public static getWriteDataPacket(hexString: string): string {
    if (TextUtils.isEmpty(hexString) || hexString.length % 2 !== 0) {
      return ''
    }
    let dataField: string = ''
    if (hexString.startsWith(HexUtil.UPDATE_HEAD)) {
      dataField = hexString.replace(HexUtil.UPDATE_HEAD, '')
    } else {
      dataField = HexUtil.WRITE_PACKET_DATE_START.concat(hexString, HexUtil.WRITE_PACKET_DATE_END)
    }
    return dataField
  }
  public static stringToHex(s: string): string {
    let str: string = ''
    let len: number = s.length
    let index: number = 0
    while (index < len) {
      let ch: number = s.charCodeAt(index)
      let s4: string = ch.toString(16)
      str = str + s4
      index += 1
    }
    return str
  }
  public static hexToString(data:string):string {
    let val : string = ''
    let arr:string[] = data.split(',')
    let index:number = 0
    while(index < arr.length) {
      val += String.fromCharCode(parseInt(arr[index], 16))
      index += 1
    }
    let b:string = decodeURIComponent(val)
    console.log('hexToString b' + b)
    return b
  }
  public static  ab2hex(buffer:ArrayBuffer):string {
    var hexArr = Array.prototype.map.call(
      new Uint8Array(buffer),
      function (bit) {
        return ('00' + bit.toString(16)).slice(-2)
      }
    )
    return hexArr.join(',');
  }
  /**
   * 過濾通知消息頭和消息尾
   * @param data
   */
  public static filterValue(data:string) : string {
    if (data === null) {
      return ''
    }
    return data.replace(this.NOTIFY_DATE_START, '').replace(this.NOTIFY_DATE_END, '')
  }
}
字符工具:TextUtils
export default class TextUtils{
    public static isEmpty(text: string): boolean {
        return text == null || text == undefined || text.length==0;
    }
    public static toCharArray(text: string): Array<string> {
        let arr: string[] = new Array(text.length);
        let index = 0
        while(index < text.length) {
            arr[index] = text.charAt(index);
            index += 1
        }
        return arr;
    }
}