Go Gio 實戰:煮蛋計時器的實現之帶邊距的按鈕
作者: 程序員ug
margins 使用設備獨立的單位:unit.Dp。如果你希望所有邊的邊距都相同,還有一個方便的 UniformInset( ),可以為你節省幾次按鍵操作。
01 本節目標
在按鈕兩邊加上空白,即帶邊距的按鈕,如下圖。
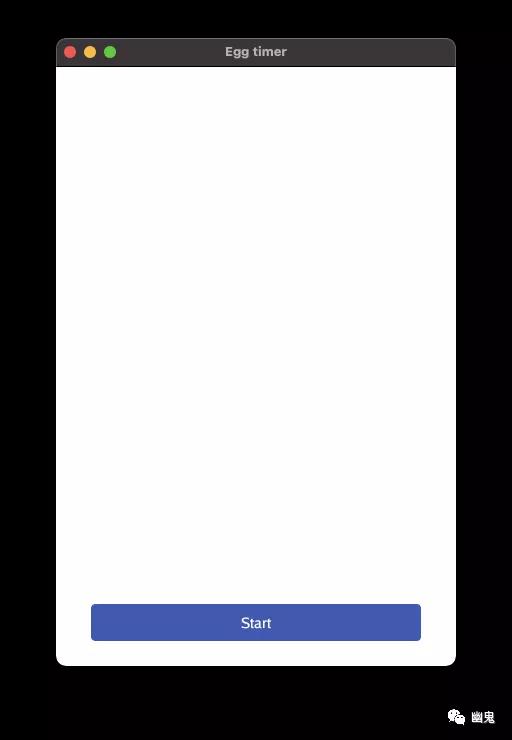
Button with margin
02 關鍵代碼
- 為了突出結構,主要關注下面關鍵點:
- 使用 layout.Inset 定義邊距
- 布局這些邊距
在這些邊距內創建按鈕
代碼如下:
- layout.Flex{
- // ...
- }.Layout(gtx,
- layout.Rigid(
- func(gtx C) D {
- // 1、使用 layout.Inset 定義邊距
- margin := layout.Inset{
- // ...
- }
- // 2、布局這些邊距
- margins.Layout(
- // 3、在這些邊距內創建按鈕
- func(gtx C) D {
- btn := material.Button(th, &startButton, "Start")
- return btn.Layout(gtx)
- },
- )
- }
- }
- )
- )
03 代碼詳解
上面就像一個中間有一個按鈕的甜甜圈。這個比喻形象嗎?
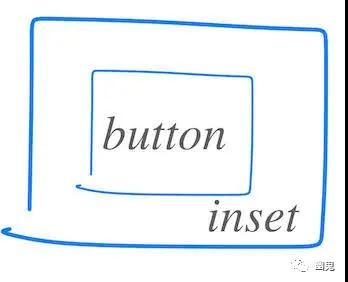
Button inside inset
邊距是使用 layout.Inset{} 構建的。它是一個結構體,定義了小部件周圍的空間:
- margins := layout.Inset{
- Top: unit.Dp(25),
- Bottom: unit.Dp(25),
- Right: unit.Dp(35),
- Left: unit.Dp(35),
- }
在這里,margins 使用設備獨立的單位:unit.Dp。如果你希望所有邊的邊距都相同,還有一個方便的 UniformInset( ),可以為你節省幾次按鍵操作。
04 完整代碼
以下是 system.FrameEvent 部分的完整代碼:
- case system.FrameEvent:
- gtx := layout.NewContext(&ops, e)
- // Let's try out the flexbox layout concept
- layout.Flex{
- // Vertical alignment, from top to bottom
- Axis: layout.Vertical,
- // Empty space is left at the start, i.e. at the top
- Spacing: layout.SpaceStart,
- }.Layout(gtx,
- layout.Rigid(
- func(gtx C) D {
- // 1、使用 layout.Inset 定義邊距
- margins := layout.Inset{
- Top: unit.Dp(25),
- Bottom: unit.Dp(25),
- Right: unit.Dp(35),
- Left: unit.Dp(35),
- }
- // 2、布局這些邊距
- return margins.Layout(gtx,
- // 3、在這些邊距內創建按鈕
- func(gtx C) D {
- btn := material.Button(th, &startButton, "Start")
- return btn.Layout(gtx)
- },
- )
- },
- ),
- )
- e.Frame(gtx.Ops)
責任編輯:武曉燕
來源:
幽鬼