談?wù)凧ava中自定義注解及使用場景
Java自定義注解一般使用場景為:自定義注解+攔截器或者AOP,使用自定義注解來自己設(shè)計框架,使得代碼看起來非常優(yōu)雅。本文將先從自定義注解的基礎(chǔ)概念說起,然后開始實戰(zhàn),寫小段代碼實現(xiàn)自定義注解+攔截器,自定義注解+AOP。
一. 什么是注解(Annotation)
Java注解是什么,以下是引用自維基百科的內(nèi)容
Java注解又稱Java標(biāo)注,是JDK5.0版本開始支持加入源代碼的特殊語法元數(shù)據(jù)。
Java語言中的類、方法、變量、參數(shù)和包等都可以被標(biāo)注。和Javadoc不同,Java標(biāo)注可以通過反射獲取標(biāo)注內(nèi)容。在編譯器生成類文件時,標(biāo)注可以被嵌入到字節(jié)碼中。Java虛擬機(jī)可以保留標(biāo)注內(nèi)容,在運行時可以獲取到標(biāo)注內(nèi)容。當(dāng)然它也支持自定義Java標(biāo)注。
二. 注解體系圖
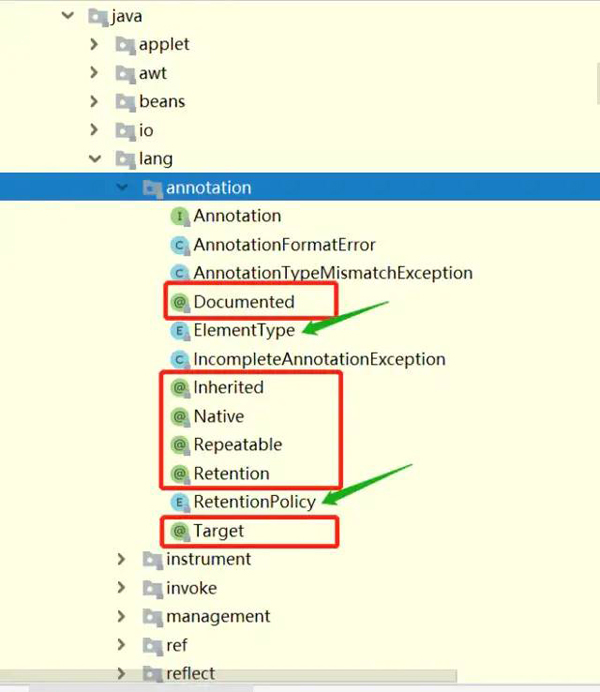
元注解:java.lang.annotation中提供了元注解,可以使用這些注解來定義自己的注解。主要使用的是Target和Retention注解
注解處理類:既然上面定義了注解,那得有辦法拿到我們定義的注解啊。java.lang.reflect.AnnotationElement接口則提供了該功能。注解的處理是通過java反射來處理的。
如下,反射相關(guān)的類Class, Method, Field都實現(xiàn)了AnnotationElement接口。
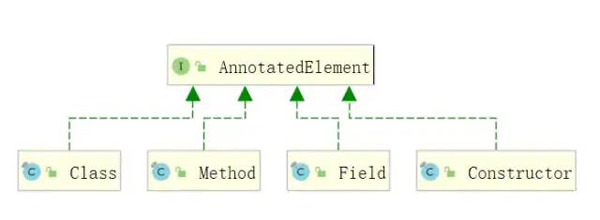
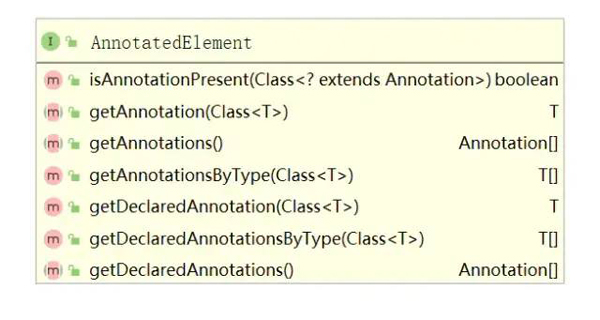
因此,只要我們通過反射拿到Class, Method, Field類,就能夠通過getAnnotation(Class<T>)拿到我們想要的注解并取值。
搜索Java知音公眾號,回復(fù)“后端面試”,送你一份Java面試題寶典
三. 常用元注解
Target:描述了注解修飾的對象范圍,取值在java.lang.annotation.ElementType定義,常用的包括:
- METHOD:用于描述方法
- PACKAGE:用于描述包
- PARAMETER:用于描述方法變量
- TYPE:用于描述類、接口或enum類型
Retention: 表示注解保留時間長短。取值在java.lang.annotation.RetentionPolicy中,取值為:
- SOURCE:在源文件中有效,編譯過程中會被忽略
- CLASS:隨源文件一起編譯在class文件中,運行時忽略
- RUNTIME:在運行時有效
只有定義為RetentionPolicy.RUNTIME時,我們才能通過注解反射獲取到注解。
所以,假設(shè)我們要自定義一個注解,它用在字段上,并且可以通過反射獲取到,功能是用來描述字段的長度和作用。
- @Target(ElementType.FIELD) // 注解用于字段上
- @Retention(RetentionPolicy.RUNTIME) // 保留到運行時,可通過注解獲取
- public @interface MyField {
- String description();
- int length();
- }
四. 示例-反射獲取注解
先定義一個注解:
- @Target(ElementType.FIELD)
- @Retention(RetentionPolicy.RUNTIME)
- public @interface MyField {
- String description();
- int length();
- }
通過反射獲取注解
- public class MyFieldTest {
- //使用我們的自定義注解
- @MyField(description = "用戶名", length = 12)
- private String username;
- @Test
- public void testMyField(){
- // 獲取類模板
- Class c = MyFieldTest.class;
- // 獲取所有字段
- for(Field f : c.getDeclaredFields()){
- // 判斷這個字段是否有MyField注解
- if(f.isAnnotationPresent(MyField.class)){
- MyField annotation = f.getAnnotation(MyField.class);
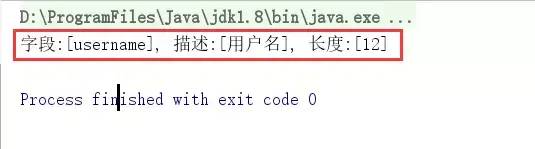
- System.out.println("字段:[" + f.getName() + "], 描述:[" + annotation.description() + "], 長度:[" + annotation.length() +"]");
- }
- }
- }
- }
運行結(jié)果
應(yīng)用場景一:自定義注解+攔截器 實現(xiàn)登錄校驗
接下來,我們使用springboot攔截器實現(xiàn)這樣一個功能,如果方法上加了@LoginRequired,則提示用戶該接口需要登錄才能訪問,否則不需要登錄。
首先定義一個LoginRequired注解
- @Target(ElementType.METHOD)
- @Retention(RetentionPolicy.RUNTIME)
- public @interface LoginRequired {
- }
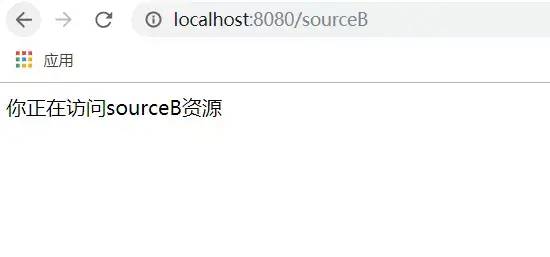
然后寫兩個簡單的接口,訪問sourceA,sourceB資源
- @RestController
- public class IndexController {
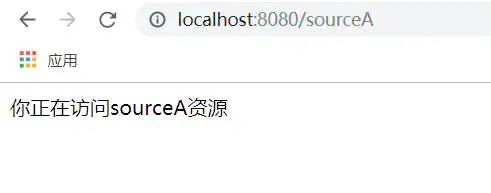
- @GetMapping("/sourceA")
- public String sourceA(){
- return "你正在訪問sourceA資源";
- }
- @GetMapping("/sourceB")
- public String sourceB(){
- return "你正在訪問sourceB資源";
- }
- }
沒添加攔截器之前成功訪問
實現(xiàn)spring的HandlerInterceptor 類先實現(xiàn)攔截器,但不攔截,只是簡單打印日志,如下:
- public class SourceAccessInterceptor implements HandlerInterceptor {
- @Override
- public boolean preHandle(HttpServletRequest request, HttpServletResponse response, Object handler) throws Exception {
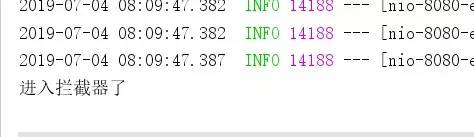
- System.out.println("進(jìn)入攔截器了");
- return true;
- }
- @Override
- public void postHandle(HttpServletRequest request, HttpServletResponse response, Object handler, ModelAndView modelAndView) throws Exception {
- }
- @Override
- public void afterCompletion(HttpServletRequest request, HttpServletResponse response, Object handler, Exception ex) throws Exception {
- }
- }
實現(xiàn)spring類WebMvcConfigurer,創(chuàng)建配置類把攔截器添加到攔截器鏈中
- @Configuration
- public class InterceptorTrainConfigurer implements WebMvcConfigurer {
- @Override
- public void addInterceptors(InterceptorRegistry registry) {
- registry.addInterceptor(new SourceAccessInterceptor()).addPathPatterns("/**");
- }
- }
攔截成功如下
在sourceB方法上添加我們的登錄注解@LoginRequired
- @RestController
- public class IndexController {
- @GetMapping("/sourceA")
- public String sourceA(){
- return "你正在訪問sourceA資源";
- }
- @LoginRequired
- @GetMapping("/sourceB")
- public String sourceB(){
- return "你正在訪問sourceB資源";
- }
- }
簡單實現(xiàn)登錄攔截邏輯
- @Override
- public boolean preHandle(HttpServletRequest request, HttpServletResponse response, Object handler) throws Exception {
- System.out.println("進(jìn)入攔截器了");
- // 反射獲取方法上的LoginRequred注解
- HandlerMethod handlerMethod = (HandlerMethod)handler;
- LoginRequired loginRequired = handlerMethod.getMethod().getAnnotation(LoginRequired.class);
- if(loginRequired == null){
- return true;
- }
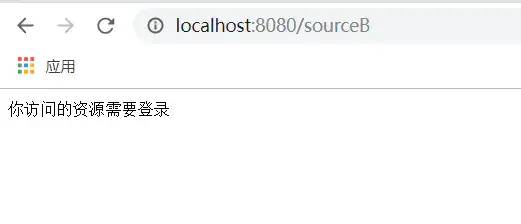
- // 有LoginRequired注解說明需要登錄,提示用戶登錄
- response.setContentType("application/json; charset=utf-8");
- response.getWriter().print("你訪問的資源需要登錄");
- return false;
- }
運行成功,訪問sourceB時需要登錄了,訪問sourceA則不用登錄
應(yīng)用場景二:自定義注解+AOP 實現(xiàn)日志打印
先導(dǎo)入切面需要的依賴包
- <dependency>
- <groupId>org.springframework.boot</groupId>
- <artifactId>spring-boot-starter-aop</artifactId>
- </dependency>
定義一個注解@MyLog
- @Target(ElementType.METHOD)
- @Retention(RetentionPolicy.RUNTIME)
- public @interface MyLog {
- }
定義一個切面類,見如下代碼注釋理解:
- @Aspect // 1.表明這是一個切面類
- @Component
- public class MyLogAspect {
- // 2. PointCut表示這是一個切點,@annotation表示這個切點切到一個注解上,后面帶該注解的全類名
- // 切面最主要的就是切點,所有的故事都圍繞切點發(fā)生
- // logPointCut()代表切點名稱
- @Pointcut("@annotation(me.zebin.demo.annotationdemo.aoplog.MyLog)")
- public void logPointCut(){};
- // 3. 環(huán)繞通知
- @Around("logPointCut()")
- public void logAround(ProceedingJoinPoint joinPoint){
- // 獲取方法名稱
- String methodName = joinPoint.getSignature().getName();
- // 獲取入?yún)?nbsp;
- Object[] param = joinPoint.getArgs();
- StringBuilder sb = new StringBuilder();
- for(Object o : param){
- sb.append(o + "; ");
- }
- System.out.println("進(jìn)入[" + methodName + "]方法,參數(shù)為:" + sb.toString());
- // 繼續(xù)執(zhí)行方法
- try {
- joinPoint.proceed();
- } catch (Throwable throwable) {
- throwable.printStackTrace();
- }
- System.out.println(methodName + "方法執(zhí)行結(jié)束");
- }
- }
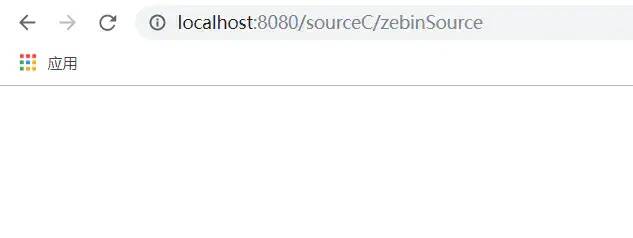
在步驟二中的IndexController寫一個sourceC進(jìn)行測試,加上我們的自定義注解:
- @MyLog
- @GetMapping("/sourceC/{source_name}")
- public String sourceC(@PathVariable("source_name") String sourceName){
- return "你正在訪問sourceC資源";
- }
啟動springboot web項目,輸入訪問地址