手機與PC的網絡協議
現在我們用一臺電腦做服務器,一部手機做客戶端,來實現手機與電腦之間的通信啦。首先,異曲同工,在手機上建立客戶端與在電腦上是差不多的,首先我們現在電腦上面建立服務器如下:
- package 手機與PC端通信;
- import java.io.IOException;
- import java.net.ServerSocket;
- import java.net.Socket;
- public class Server {
- public void setup(int port){
- try {
- //創建服務器
- ServerSocket host=new ServerSocket(port);
- System.out.println("通信端口"+port+"成功開啟");
- while(true){
- //等待客戶端訪問
- Socket socket=host.accept();
- System.out.println("有人訪問了");
- //把跟客戶端交流的事情交給線程處理
- ServerThread st = new ServerThread(socket);
- //開啟線程
- st.start();
- }
- } catch (IOException e) {
- // TODO Auto-generated catch block
- e.printStackTrace();
- }
- }
- public static void main(String[] args){
- //傳入端口號
- new Server().setup(8888);
- }
- }
接下來建立線程來處理socket得到的輸入流以及輸出流:
- package 手機與PC端通信;
- import java.io.DataInputStream;
- import java.io.DataOutputStream;
- import java.io.IOException;
- import java.io.InputStream;
- import java.io.OutputStream;
- import java.net.Socket;
- public class ServerThread extends Thread {
- private Socket socket;
- private DataOutputStream dos;
- public ServerThread(Socket socket){
- this.socket=socket;
- }
- public void run(){
- //得到網絡連接socket得到的輸出輸入流
- try {
- //輸入流
- InputStream input=socket.getInputStream();
- DataInputStream dis=new DataInputStream(input);
- //得到客戶端的輸出流
- dos=new DataOutputStream(socket.getOutputStream());
- //讀取客戶端發到服務端的字節
- while(true){
- int msgType=dis.readInt();
- int len=dis.readInt();
- byte[] bytes=new byte[len];
- dis.readFully(bytes);
- String content=new String(bytes,"GB2312");
- System.out.println("客戶端說:"+content);
- //這里是發到客戶端的
- String replyString = "服務器收到了("+content+")";
- bytes = replyString.getBytes("GB2312");
- //寫進是文字 1
- dos.writeInt(1);
- //輸出流寫進字節長度
- dos.writeInt(bytes.length);
- //寫進字節
- dos.write(bytes);
- //刷新
- dos.flush();
- }
- } catch (IOException e) {
- // TODO Auto-generated catch block
- e.printStackTrace();
- }
- }
- }
這些內容在上節中都已經講過,這里不做過多闡述
接下來就是重點內容啦,就是在Android中建立客戶端,這里我們要使用帶安卓插件的eclipse來編寫
首先處理界面,我大概定義了一個textview來顯示聊天內容,editText來進行輸入框的角色,再者就是一個發送按鈕,這樣一個簡單的聊天界面就已經完成了,如下,簡潔的小界面,讀者們可以自行美化界面哈:
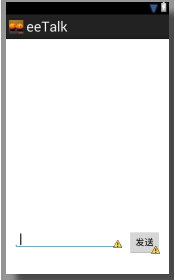
***記得綁定發送按鈕到指定函數哦。#p#
接下來就是在MainActivity中開始動工了,動工之前,講一個非常重要的函數Handler,我們知道,在UI界面主線程中,我們肯定要獲取到輸入框輸入的文字來發送到服務器上,Android里面的線程是不能直接訪問Ui組件的,例如:在另一個線程調用textView。setText(“23232”);在編譯的時候是沒有問題的,但是在運行時就會報錯,所以這時候就要用到handler的函數,我們在這里可以理解為一個中介,子線程將信息綁定在handler上,handler將信息更新到主函數UI上,里面會用到callBack函數,具體代碼里講,萬事俱備,只差將網絡權限添加到你的手機上了,在AndroidMainfest.xml文件中,在
android:minSdkVersion="8"
android:targetSdkVersion="18" />后面添加網絡允許代碼,就是下面這一句
接下來,就是UI界面MainActivity.java代碼如下:
- import android.os.Bundle;
- import android.os.Handler;
- import android.os.Message;
- import android.app.Activity;
- import android.util.Log;
- import android.view.Menu;
- import android.view.View;
- import android.view.View.OnClickListener;
- import android.widget.Button;
- import android.widget.EditText;
- import android.widget.TextView;
- import android.widget.Toast;
- public class MainActivity extends Activity {
- //聊天區域
- private TextView textMsgLog;
- //客戶端處理線程
- private ClientThread clientThread;
- protected void onCreate(Bundle savedInstanceState) {
- super.onCreate(savedInstanceState);
- setContentView(R.layout.activity_main);
- Button btnSend=(Button)findViewById(R.id.btnSend);
- //聊天顯示界面
- textMsgLog=(TextView)findViewById(R.id.textMsgLog);
- Log.i("test", "oooooooooooooo11111");
- //創建Handler對象,介于主線程和子線程一個代理,子線程ClientThread將要傳遞的數據通過
- //Handler傳遞給主進程UI,數據在UI上更新
- Handler.Callback callback=new Handler.Callback(){
- public boolean handleMessage(Message msg){
- //
- textMsgLog.append("服務器:" + msg.obj.toString() +
- "\n");
- return true;
- }
- };
- Handler handler=new Handler(callback);
- clientThread =new ClientThread(handler);
- clientThread.start();
- }
- //將文本輸入框的發送給服務器
- public void send(View v){
- //得到輸入框
- EditText editInput = (EditText)findViewById(R.id.editInput);
- //得到輸入框中文字
- String msg = editInput.getText().toString();
- //調用,寫到服務器上,返回成功
- boolean result = clientThread.sendText(msg);
- textMsgLog.append("我:"+msg+"\n");
- if(result){
- textMsgLog.append("我:"+msg+"\n");
- editInput.setText("");
- } else {
- Toast.makeText(this, "發送失敗", Toast.LENGTH_LONG).show();
- }
- }
- @Override
- public boolean onCreateOptionsMenu(Menu menu) {
- // Inflate the menu; this adds items to the action bar if it is present.
- getMenuInflater().inflate(R.menu.main, menu);
- return true;
- }
- }
#p#和客戶端線程,也就是剛才說的子線程代碼:
- ackage com.example.eetalk;
- import java.io.DataInputStream;
- import java.io.DataOutputStream;
- import java.io.IOException;
- import java.net.Socket;
- import java.net.UnknownHostException;
- import android.os.Handler;
- import android.os.Message;
- public class ClientThread extends Thread {
- private Handler handler;
- private DataOutputStream dos;
- private DataInputStream dis;
- private Socket socket;
- public ClientThread(Handler handler) {
- this.handler = handler;
- }
- public void run() {
- try {
- connect();
- dos.writeInt(1);
- dos.writeInt(5);
- dos.write("hello".getBytes());
- while (true) {
- //讀取服務器發過來的數據
- int msgType = dis.readInt();
- //
- System.out.println("121");
- //
- int len = dis.readInt();
- //
- byte[] bytes = new byte[len];
- dis.readFully(bytes);
- //
- String content = new String(bytes, "GB2312");
- Message msg = new Message();
- msg.what = 1;
- //
- msg.obj = content;
- //
- handler.sendMessage(msg);
- }
- } catch (IOException e) {
- e.printStackTrace();
- } finally {
- //close();
- }
- }
- private void connect() throws UnknownHostException, IOException {
- //
- socket = new Socket("172.27.35.3", 8888);
- //
- dis = new DataInputStream(socket.getInputStream());
- dos = new DataOutputStream(socket.getOutputStream());
- }
- private void close() {
- if (dis != null) {
- try {
- dis.close();
- } catch (IOException e) {
- }
- }
- if (dos != null) {
- try {
- dos.close();
- } catch (IOException e) {
- }
- }
- if (socket != null) {
- try {
- socket.close();
- } catch (IOException e) {
- }
- }
- }
- //發送到服務器的
- public boolean sendText(String content){
- try {
- //
- byte[] bytes = content.getBytes("GB2312");
- //
- dos.writeInt(1);
- //
- dos.writeInt(bytes.length);
- //
- dos.write(bytes);
- dos.flush();
- return true;
- } catch (IOException e) {
- e.printStackTrace();
- }
- return false;
- }
- }
記住你的手機和你的電腦一定要在同一個局域網,這里可以看出手機的客戶端做法與電腦是差不多的,上面手機客戶端連接的ip地址是你的電腦連入的ipv4地址,可以在cmd命令里恰如ipconfig來搜尋。
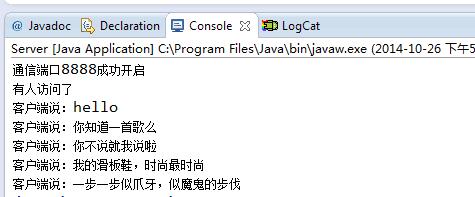
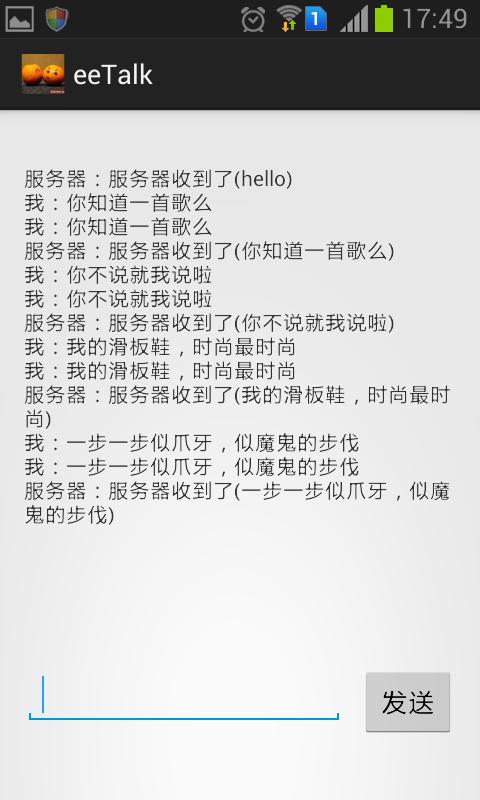
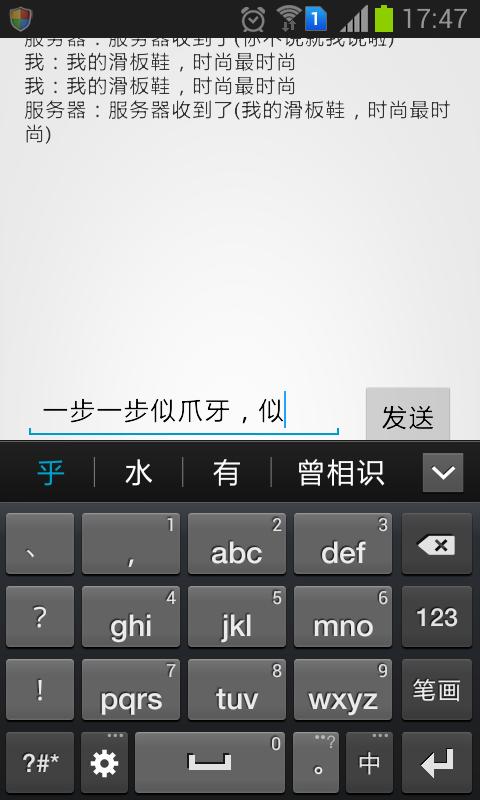
做到這里,將你的app下載到手機,打開服務器,打開手機的應用程序,就可以聊天了,記住打開網絡
美美聊天了:
這是服務器
這是手機客戶端
做到這里,就可以和手機互發圖片和文字啦,這是小編下期的實現目標 。